You get one shot—literally. The model’s stride hits the light, the fabric catches air, and you’ve got half a second before she’s out of your frame. There’s no redo, no “can we get that again?” The pace of runway photography is relentless — part sport, part choreography, and all pressure.
Every runway show has a myriad of variables: unpredictable lighting, limited shooting angles, strict access rules, and hundreds (sometimes thousands) of frames to review afterward. What separates working runway photographers from everyone else is how fast they can adapt, anticipate, and deliver flawless images before the next show.
This guide breaks down what it really takes to ace runway photography, from pre-show setup and timing your shots to managing the culling and editing grind that follows. It’s a workflow-level look at how professionals stay on top without burning out, and how the subtle use of AI tools like Aftershoot can help you transition from chaos to control without losing your creative edge.
Here’s a quick summary of what separates great runway photographers from the rest — and how to build repeatable systems that keep you in the game season after season.
Key Takeaways: Building a Repeatable Runway Photography Workflow
- Prep before the lights go up: Scout lighting, test your shutter, and pre-focus — great runway coverage starts before the show begins.
- Shoot with rhythm, not panic: Anticipate the stride and capture intention, not motion blur or overkill.
- Edit for consistency, not perfection: Cohesive tones across every look matter more than microscopic fixes.
- Deliver before they ask: Fast, clean, well-labeled galleries get you rehired every season.
- Automate the grunt work. Let AI tools like Aftershoot handle the repetitive tasks so you can free up time for the creative calls only you can make
- Build repeatable systems: A reliable workflow is your real competitive edge in the fashion circuit.
What makes runway photography its own beast
Runway photography looks simple from the outside—one subject, one direction, predictable timing. But anyone who’s shot even a small fashion week show knows how deceptive that calm looks. You’re working in unpredictable light, elbow-to-elbow with other photographers, trying to nail focus on a constantly moving subject while keeping composition clean enough for editorial use.
Unlike studio fashion work, you don’t control the light, the pace, or the pose. You’re anticipating rhythm and timing like a sport. The real skill isn’t just exposure or gear handling; it’s discipline. You need to know exactly where the model will hit the light, when the stride looks powerful, and how to make 500 variations of the same walk look intentional, not repetitive.
And then there’s the hidden half of runway work: the post-production. Every show generates thousands of frames. PR teams expect clean selects within hours. That means your workflow from culling to retouching has to be as fast as your shutter finger. The best runway photographers treat workflow as part of the craft.

This is where smart systems matter. Tools like Aftershoot accelerate the grunt work: sorting duplicates, identifying the sharpest frames, getting your base edits done, and applying subtle retouching before fatigue sets in. It’s about saving mental bandwidth for the work that actually shows your eye, not your endurance.
Read also: 8 Essential Tips for Portrait Photography Lighting
Essential Gear and Setup for Runway Photoshoots
Runway work rewards reliability more than novelty. You don’t need the latest mirrorless flagship to deliver, but you do need gear that won’t choke under pressure. Every second counts, and every failure, be it autofocus lag or a slow buffer, is a missed frame you’ll never get back.
Fashion Photography Camera and Lens Choices That Actually Work
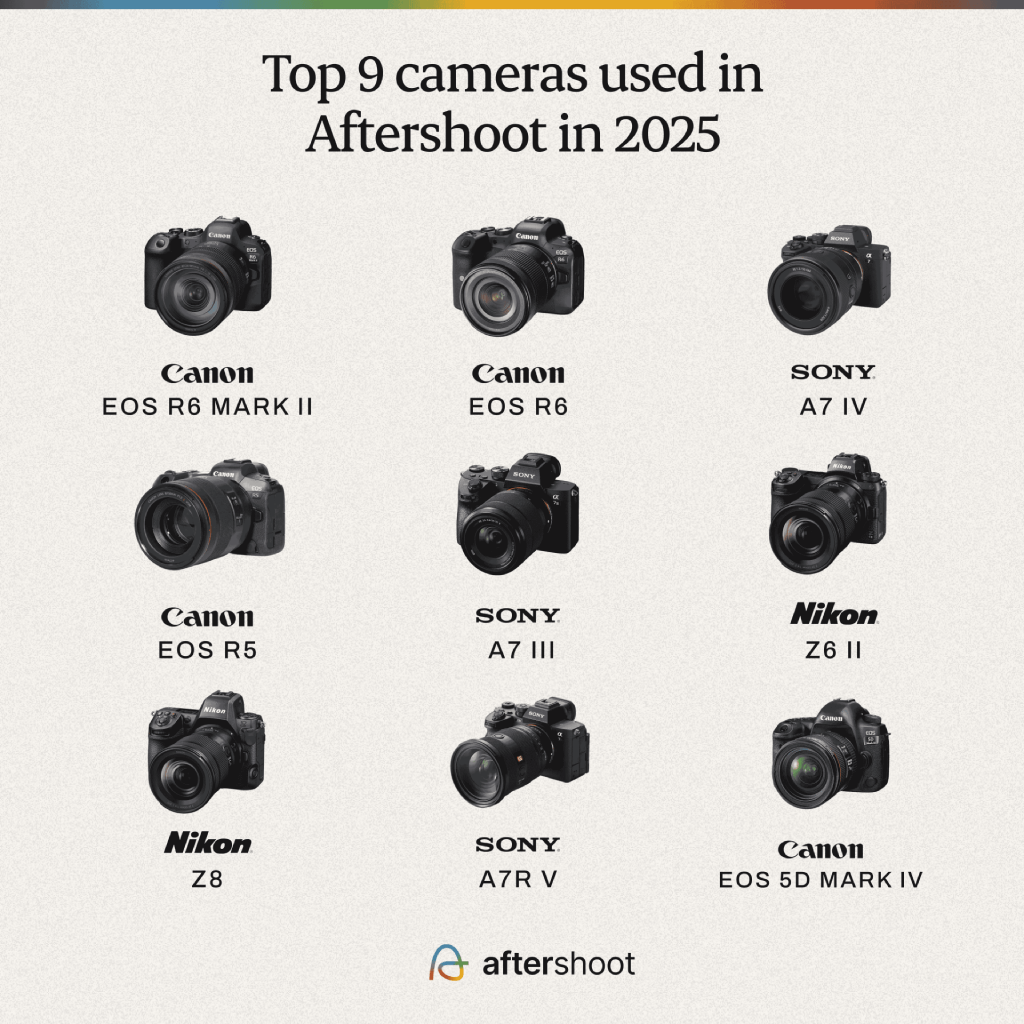
Most pros shoot full-frame bodies with fast, accurate AF systems and high burst rates (8–12 fps minimum). The priority is consistency and focus tracking.
- Primary setup: 70–200mm f/2.8 for pit work, crisp detail from mid-runway without distortion.
- Secondary lens: 24–70mm f/2.8 for full looks, group finales, or backstage coverage.
- Backup: Second body or dual card slot setup. Losing shots to a corrupted card mid-show isn’t an option.
Mirrorless shooters should enable the silent shutter to avoid banding or sound interference. DSLRs? Stick with high-speed continuous and back-button focus for better control in unpredictable lighting shifts.
Positioning and Access: Your Real Advantage
Where you stand determines what kind of story you can tell.
- The pit (end of runway): Classic symmetry, clean looks for publication, but crowded and competitive.
- Side angle: Dynamic motion shots, fabric flow, and light variation, great for an editorial feel.
- Backstage or pre-show: Brand storytelling and behind-the-scenes coverage that sells personality, not just product.
Arrive early. Mark your sightlines. Know where the “hot light” lands on the runway so you can pre-focus and anticipate. In most venues, a monopod beats a tripod, it gives you stability without taking up space or annoying your neighbors.
Camera Settings That Save the Show
Every venue’s lighting setup is different, but here’s a professional baseline:
- Shutter speed: 1/250–1/500 sec (freeze motion, avoid blur)
- Aperture: f/2.8–f/4 (balance sharpness and subject separation)
- ISO: Auto, capped at your camera’s comfort zone, runway lighting fluctuates fast
- Focus: Continuous AF with a single cross-type or tracking zone, not full-frame AF chaos
Use manual exposure where possible, especially when lighting is consistent down the runway. If not, lock exposure compensation at +0.3 to protect highlights on reflective fabrics.
Pro Tip: Plan for Post Before You Shoot
Every choice on the floor affects your post-production workload. Shooting tighter frames reduces cropping later. Staying consistent in exposure means faster editing. And accurate white balance saves hours of color correction.
Timing and Composition: The Real Skill Gap
Every photographer can press the shutter. The pros know when to press it.
Each model has a distinct pace, and every designer’s show has its own beat. Your job is to find that cadence and anticipate the micro-moments that read as power, grace, or flow. That’s what separates an average runway frame from a publishable one.
Most working photographers time their shots around the stride apex when the lead foot hits the floor, fabric lifts, and posture peaks. Fire just before that moment and let the burst capture the sequence. Too early and you’ll get awkward transitions; too late and you’ll lose tension in the pose.
Shoot to the Music, Not the Motion
You can’t rely on eye-hand reaction time alone. Many pros subconsciously time their bursts to the runway soundtrack, a steady rhythm helps predict stride intervals better than your reflexes ever could. Once you sync with the beat, you can anticipate shots without overshooting.
Control the Burst, Don’t Spray and Pray
Shooting 5,000 frames per show doesn’t make you efficient; it makes your culling hell. Think in controlled bursts of three to five frames, enough to capture expression and motion, but not so many that you spend hours deleting near-duplicates later. This is where smart culling workflows save time. AI tools like Aftershoot can identify the sharpest, best-lit frame from each stride sequence, leaving you with intentional choices instead of endless comparison.
Composition: Simplicity Wins
Clean framing always outperforms clever tricks. Keep your horizon level, background uncluttered, and crop for editorial proportion (3:2 or 4:5 works well for digital portfolios). Use the runway lights or logo backdrop to anchor symmetry.
Don’t chase gimmicks, chase clarity. A perfectly timed, well-lit frame will outlive every experimental tilt-shift or color pop trend.
Pro Tip: Think Like an Editor
Runway work is about the sequence. Editors, PR teams, and designers look for cohesion. Capture the opening look, mid-show highlights, and finale energy. The complete set tells the brand’s story.
Remember, time your shots with rhythm, compose with restraint, and shoot with your edit in mind. The less you have to fix later, the more you can deliver faster without compromising style or quality.
Lighting and Exposure Control on the Runway
Runway lighting is both your best ally and your biggest headache. It’s designed for the audience and cameras, but not your camera. Expect everything from blown-out spotlights to deep shadows and LED flicker—all changing faster than you can tweak your settings.
The trick isn’t to fight the light. It’s to build a setup that can adapt without constant manual intervention.
Expose for the “Hot Zone”
Every runway has one…the sweet spot where the light hits perfectly for 2–3 seconds. Find it during rehearsals or the opening walk, then dial in your settings for that zone. As models pass through, you’ll get consistent exposures while letting the falloff naturally vignette.
- Shutter: Keep between 1/250 and 1/500 sec to freeze the stride.
- Aperture: Stay around f/2.8–f/4 for subject separation while maintaining enough depth for motion.
- ISO: Auto ISO is fine if you set a ceiling (typically 3200 or 6400, depending on your camera).
- White balance: Lock it manually. Don’t trust Auto WB, it will drift as colors change.
Tame the LEDs
Modern fashion shows love colored LED washes, which means you’ll get shifting tones mid-walk. To keep things clean:
- Shoot RAW so you can correct hue shifts later.
- Avoid over-correcting in post, maintain the designer’s lighting intent where possible.
- Take a gray card reference during rehearsal if allowed; it’ll save you from color-balancing chaos later.
Anticipate the Transitions
Most photographers get burned at the start or end of the runway, where lights dip or models pause briefly. Pre-meter both extremes, then pick a midpoint exposure that preserves highlight detail. You can recover shadows not blown fabric textures or skin highlights.
Simplify your Workflow
Consistency beats perfection. If your exposures match across 90% of a show, you can batch-correct the rest in minutes. This is where editing efficiency comes in:
- Use tools like Aftershoot’s AI Editing to apply your signature style and fix exposures and white balance across hundreds of runway images in one go.
- Then fine-tune your hero shots manually in Lightroom or Capture One, focusing on skin tones and fabric texture.
That balance: automation for consistency, manual finesse for signature, is how runway photographers deliver galleries within hours.
Pro Tip: Treat the Light Like a Partner
Instead of fighting uneven exposure, use it to create mood. Let shadows emphasize motion or texture. The goal is intentional lighting. The audience sees a show; you’re showing the story.
Beyond the Catwalk: Backstage and Atmosphere Shots
Every runway show has two stories: the one the audience sees, and the one that happens just out of view. The best runway photographers know that the real magic often unfolds backstage: the makeup touch-ups, the quiet nerves, the designer giving a model last-minute instructions.
These moments add dimension to your coverage, and they’re what clients remember long after the last walk.
Why Backstage Work Matters
Backstage photography captures the human side of fashion—tension, teamwork, transformation. For brands and designers, these images are storytelling gold. They perform better on social media, build hype for future shows, and offer context beyond the runway itself.
If your goal is long-term relationships with fashion houses or PR teams, delivering a few polished backstage selects alongside runway coverage shows that you understand both the brand and the narrative.
Lighting and Logistics
You’ll be working with cramped spaces, harsh makeup lights, and zero room for modifiers. Keep it simple:
- Use available light whenever possible to maintain authenticity.
- If flash is necessary, bounce or diffuse it subtly, never kill the mood with flat light.
- Shoot wide (24–70mm) to capture environment and energy.
- Stay nimble: backpacks over roller bags, monopod over tripod.
Composition Tips That Add Story
Look for rhythm and repetition, multiple models getting ready in sequence, or stylists synchronizing their final touches. Frame mirrors and reflections creatively, but avoid clutter. Remember, this isn’t BTS chaos; it’s controlled storytelling.
When you get access to the designer or lead stylist, capture those interactions. A single candid of approval or relief can summarize the entire event better than a hundred runway frames.
Workflow Note: Integrating Backstage and Runway
Backstage coverage usually means mixed lighting and color temperatures, a nightmare to balance later. Shooting RAW is non-negotiable here. During post, batch-edit all backstage images together to maintain tonal consistency before merging them with your runway selects.
If you’re using Aftershoot, cull both sets separately, runway for stride and sharpness, backstage for expression and storytelling. The AI will automatically group duplicates and flag technical issues, so you can focus on curating narrative flow rather than fixing exposure inconsistencies.
Pro Tip: Backstage Builds Relationships
The pit gets you credentials. Backstage gets you callbacks. Designers and stylists remember the photographers who capture them authentically under pressure, not just their finished looks. Delivering those behind-the-scenes moments turns one-off assignments into repeat invitations.
Common runway photography mistakes (and how to avoid them)
Every runway photographer has been there, missed focus, wrong exposure, or hundreds of nearly identical frames that make you question your life choices. The good news? Most mistakes are predictable and preventable with a smarter workflow.
Here’s what trips up even seasoned pros and how to fix it fast.
| Mistake | What happens | How to fix it |
| Spray-and-pray shooting | You end up with 3,000 nearly identical frames and burn hours in culling. | Time your bursts to stride rhythm and use AI culling (like Aftershoot) to pick the sharpest, best-lit shot from each sequence. |
| Relying on Auto WB and exposure | Lighting changes cause color inconsistency and overexposed highlights. | Lock manual white balance and expose for the runway’s “hot zone.” Adjust for shadows later in post. |
| Ignoring venue lighting tests | You discover mid-show that LEDs flicker or create color banding. | Arrive early for rehearsals; test at 1/250–1/500 sec to check for flicker before the show starts. |
| Shooting too tight or from one spot | Repetitive framing makes your gallery feel flat. | Mix focal lengths or switch angles between shows; capture wide environmental frames to break monotony. |
| Editing every frame manually | You lose valuable hours (and sanity) trying to fix lighting inconsistencies by hand. | Automate first-pass edits with AI tools to normalize exposure and color; save your creative energy for hero shots. |
| Neglecting client naming and export structure | Files get lost or mislabeled during delivery. | Use structured naming (designer_show_lookXX.jpg) and batch exports by look or model. |
| Overusing flash backstage | You flatten lighting and ruin the atmosphere. | Use available light where possible; if you must use flash, bounce it off nearby surfaces to maintain mood. |
| Skipping backups | You risk losing entire shows to card failure. | Dual-slot recording + immediate cloud or RAID backup after import — non-negotiable. |
Pro Tip: Perfection Slows You Down
Runway photography rewards consistency, not perfection. The best photographers are the ones who deliver on time, every time. Efficiency is your competitive edge.
Post-Processing Workflow for Runway Photography
The show might last 15 minutes, but post-processing can stretch into an all-nighter if you don’t have a system that works for you. A single runway sequence can produce 2,000–4,000 frames, most of them near-duplicates and deadlines don’t care how long it takes to find the keepers.
The pros who survive (and stay sane) don’t edit harder, they edit smarter.
Step 1: Cull with Intention
Right after import, separate your files into looks, angles, or lighting zones if possible. Most runway photographers use a dual-screen setup: one to flag sharpness, one for exposure and pose.
But here’s the truth, even the most disciplined culling still eats time. That’s why AI culling tools like Aftershoot have quietly become standard in high-volume workflows. It automatically identifies:
- The sharpest frames per stride sequence
- Consistent exposures
- Eyes open, clean expressions
- Eliminates near-duplicates
You can still override every choice, but instead of combing through thousands of identical shots, you’re curating from the top 10%. That’s the difference between hours of manual clicking and a 20-minute decision session.
Step 2: Apply a Base Edit for Consistency
Runway lighting changes constantly, and batch edits often fall apart when exposure or color fluctuates. The goal here is cohesion.
You can use Aftershoot’s AI Editing or similar tools to apply your signature style and unify exposure, white balance, and tone across hundreds of shots. Think of it as your digital light tech setting a consistent baseline before your artistic polish.
When you import these into Lightroom or Capture One, all your frames already live in the same tonal space. That means your selective adjustments (fabric texture, highlight recovery, skin tone correction) stay consistent without rebalancing each series.
Step 3: Refine, Don’t Rebuild
Now that your gallery is pre-cleaned and balanced, you can focus on where your style matters—the hero shots. These are the images that go to editors, press teams, and client socials.
- Fine-tune skin tones
- Recover fabric detail on metallics
- Apply lens corrections and sharpening
- Export in both full-res and web-ready sizes
Most runway editors export one cohesive set of 30–40 hero shots per show—tight, intentional, and publication-ready.
Pro Tip: Use AI retouching to get natural results instantly. Then export to Photoshop to add your creative finesse.
Still wasting hours sorting and editing? Step inside Aftershoot’s workflow in under 5 minutes. Take this interactive demo to know exactly how you can cut your post-shoot time in half
Step 4: Deliver Fast
Fashion PR timelines move at lightning speed. Deliver a clean gallery within 12–24 hours while archiving the full set for follow-ups or post-campaign use.
- Use naming conventions tied to designer + look numbers.
- Back up raw—cloud or RAID.
- Maintain export presets for media vs. client delivery.
When speed and reliability are your reputation, your workflow becomes your brand.
Why this Matters
Runway photographers aren’t paid for the hours they spend behind a monitor, they’re paid for how fast they can turn a live event into polished, usable gallery for publication. Tools like Aftershoot handle the repetitive tasks so you can focus on creative precision, client delivery, and the next show in your schedule.
That’s what makes runway work sustainable, not just skill, but system.
Delivery and Client Expectations
In runway photography, your reputation is defined by how fast and how consistently you deliver. Designers, stylists, and PR teams run on impossible timelines, and the first photographer to deliver polished, usable images often gets the next season’s call.
A show that ends at 9 p.m. can have images published by 10. That’s the standard. In fact, our Great Workflow Shift report (2025) found that photographers are positioning speed as a premium service, and only 9% of them delivered within 48 hours—a huge opportunity gap for photographers like you.
Set the Right Turnaround Time
Most professionals aim to deliver within 12–24 hours, with a mini set of highlights (10–20 images) often going out within hours for social and press use.
Here’s a practical approach that balances speed and sanity:
- Cull and base-edit immediately — Aftershoot can finish this stage in under an hour while you back up cards and label folders.
- Export social-ready previews first (1080p, compressed JPEGs with light sharpening).
- Deliver the full gallery the next day, edited and branded.
By separating immediate delivery from full delivery, you stay responsive without sacrificing quality.
Maintain Brand Consistency
Every designer has a visual identity. Your edits should complement that, not overwrite it.
- For high-fashion labels, prioritize clean tones and editorial contrast.
- For avant-garde or streetwear brands, lean into atmosphere and edge.
- Always double-check background banners and logos for accurate color representation.
Creating a consistent color palette across multiple shows (especially during Fashion Week) builds your visual credibility.
Delivery Formats That Impress
Speed matters, but presentation sells. Organize your exports for easy use:
- Press-ready: 300 DPI, full-resolution JPEGs, consistent file naming (designer_show_look01.jpg).
- Social-ready: 2000px longest edge, 72 DPI, subtle watermark if needed.
- Archive set: RAW + edited JPEGs stored by date and event for long-term reuse.
Use online galleries like Pic-Time, Pixieset, or Dropbox Pro with clearly labeled folders: one for the press team, one for the designer, and one for internal use. Include metadata (your name, show title, and date) in every file for future attribution.
Communication Is Part of the Job
Professionalism doesn’t stop when the files upload. A short, well-timed follow-up email to the client or PR contact can turn a one-off show into a recurring relationship.
- Keep it simple: “Highlights are uploaded, full set will be ready by tomorrow morning.”
- Offer two or three standout frames for their socials in advance. It shows initiative and reliability.
- Credit the team correctly—agencies notice those details.
Pro Tip: Consistency = Retention
In fashion, reliability gets you further than originality. Deliver consistently, communicate clearly, and automate wherever you can. When clients know you’ll hit every deadline without micromanagement, you become part of their process, not just a name on a press list.
Runway Photography Workflow: How Pros Deliver Fast and Flawless Galleries
Runway photography is sort of choreography. The best photographers don’t just react to the show; they anticipate it, systematize it, and deliver under pressure without breaking stride.
Speed alone doesn’t make you professional. Controlled speed does, knowing when to shoot, when to stop, and when to let AI do the heavy lifting.
That’s where tools like Aftershoot quietly change the game: taking care of the repetitive work so you can focus on the frames that define your style and the stories that keep clients coming back.
In the end, great runway photographers share one secret: they make precision look effortless. But behind that effortlessness is process, discipline, and a workflow built to handle fashion’s fastest moments.
Ready to experience the possibilities? Try Aftershoot free for 30 days and see the difference yourself.
FAQ: Runway Photography Essentials
1. What camera settings work best for runway photography?
Start around 1/250–1/500 sec, f/2.8–f/4, and Auto ISO capped around 3200–6400. Lock your white balance manually and shoot RAW for flexibility in post.
2. Should I use flash during a runway show?
Usually not. Most shows prohibit flash because it disrupts the lighting design and other photographers. Save flash for backstage or pre-show portraits.
3. What lens is best for runway photography?
A 70–200mm f/2.8 is the classic choice for pit work. Pair it with a 24–70mm f/2.8 for wider, more dynamic shots or backstage coverage.
4. How do I deal with changing runway lighting?
Expose for the “hot zone”, the brightest point on the runway and let shadows fall naturally. Manual white balance and RAW shooting keep your tones consistent.
5. How do professionals cull thousands of runway photos quickly?
They use AI tools like Aftershoot to auto-select the sharpest, best-lit, and most expressive frames. Then they refine the final set manually for consistency.
6. What’s a realistic turnaround time for runway galleries?
Within 12–24 hours for full delivery, with a few highlight images sent within hours for social or press use.
7. How can I make my runway photography stand out?
Tell the full story: capture the energy backstage, the audience, and the designer’s presence. Precision gets you published; storytelling gets you remembered.