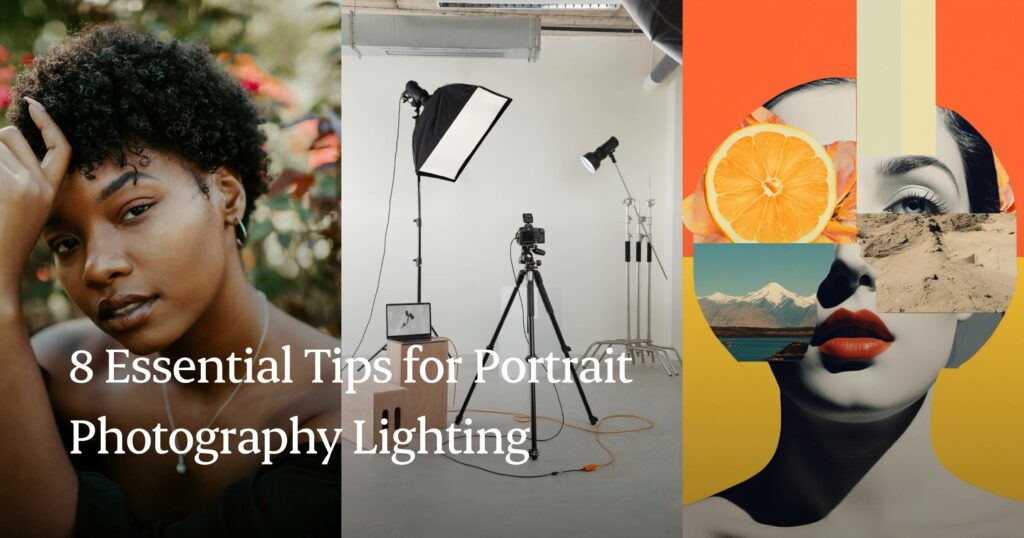
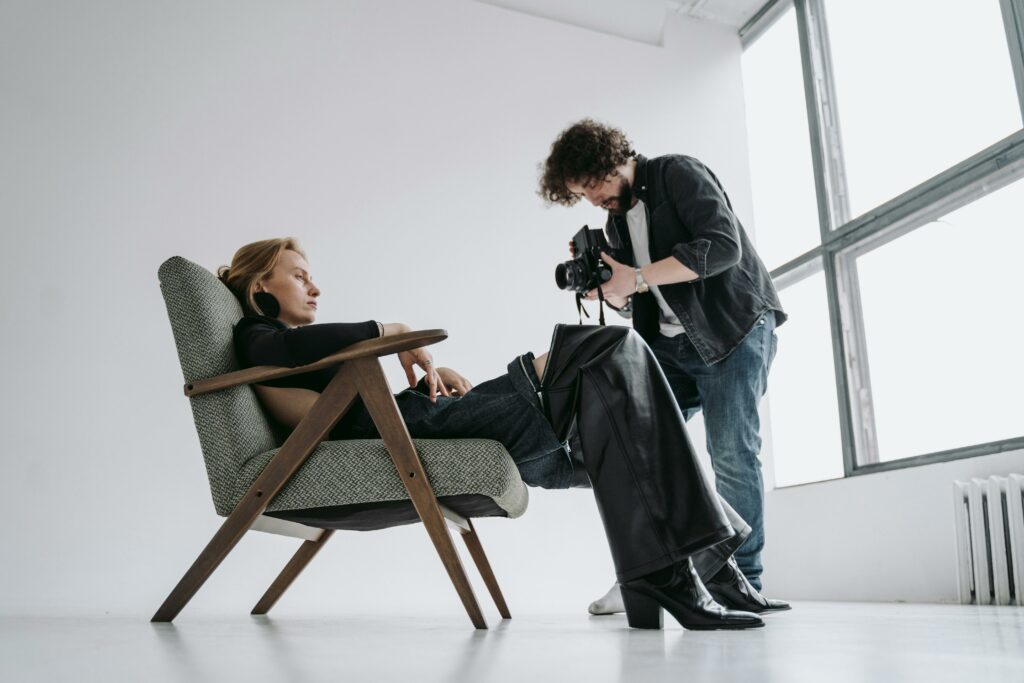
When it comes to portrait photography, lighting can make or break your shot. You can have the most stunning subject, the sharpest lens, and a killer backdrop, but the whole image can fall flat if the lighting isn’t working. And as pros, we don’t just aim for decent, we want wow-worthy portraits that make clients do a double-take.
You’ve probably already experimented with different portrait lighting setups over the years, maybe even developed a go-to formula that rarely fails. But the beauty of lighting is that it’s endlessly creative. A small shift in angle, a subtle tweak in intensity, or a change in source can completely transform the story your portrait tells.
We’ll discuss the common lighting challenges portrait photographers face, from harsh shadows and unflattering skin tones to gear limitations and unpredictable environments. Then, we’ll discuss the solutions: essential lighting patterns, portrait lighting techniques for different face shapes and skin tones, and gear setups that work whether you’re in a studio or shooting on location.
Because once you understand how to see and shape light, everything else in your portrait workflow gets easier, and your images start to speak for themselves.
Why Portrait Photography Lighting Matters
Every photographer hits that moment: you look at your work and think, technically, it’s fine, but why doesn’t it feel better? More often than not, the missing piece is how the light is working (or not working) in your image.
Lighting isn’t just a technical element; it’s the storyteller behind every great portrait.
It sculpts the face, sets the mood, and draws the viewer’s eye exactly where you want it. Whether you’re shooting editorial-style headshots, moody black-and-white portraits, or bright lifestyle images, lighting is what defines the emotion and atmosphere of the shot.
Think about it: soft, diffused light can smooth skin and create a dreamy, romantic vibe, while harsh, directional light can add drama and intensity. The difference between flat, lifeless light and carefully crafted shadows is often what separates an amateur photo from a professional one.
As portrait photographers, we also have to work with a range of skin tones, face shapes, and environments. The right lighting helps you flatter your subject, minimize distractions, and bring out their personality, not just their features.
Most importantly? Good lighting gives you consistency. It makes your photo editing workflow smoother, helps you nail the exposure in-camera, and delivers a polished look that builds your signature style.
Lighting isn’t an afterthought; it’s one of your most powerful creative tools in your arsenal. If you use it right, it makes a world of difference.
In the sections that follow, we’ll explain the foundational principles behind light quality, direction, and color and show you how to use them to create portraits that feel as good as they look.
1. Hard vs. Soft Light: The First Lighting Choice That Changes Everything
One of the fastest ways to elevate your portraits is by understanding the quality of your light. Most lighting mistakes aren’t about having the wrong gear; they come from not knowing how light behaves. And the most important distinction to start with is this: hard light vs. soft light.
What Is Hard Light?
Hard light comes from small, direct sources, like the sun at noon, a bare speedlight, or an unmodified flash. It casts crisp, defined shadows and brings out every contour and texture in your subject’s face.
This kind of light can be powerful when you want a bold, edgy feel. It’s popular in fashion editorials and athletic portraits because it emphasizes structure and strength. But it also comes with risks. Without careful positioning, hard light can exaggerate blemishes, deepen wrinkles, and create shadows that feel unintentional or harsh. This makes it harder in your retouching process.
If you’ve ever taken a portrait where the shadows felt too intense or the face looked uneven, hard light was likely the culprit.
What Is Soft Light?
Soft light comes from larger, diffused sources, such as an overcast sky, a window with sheer curtains, or a softbox. It wraps around the subject more gently, reducing harsh shadows and smoothing out skin texture.
This is the light most portrait photographers rely on because it’s forgiving and flattering. It’s ideal for beauty photography, family sessions, and most general portrait work. Soft light helps you highlight your subject while keeping the mood approachable, clean, and natural.
“Even though the clouds are going to act like a softbox for the sun… I am still going to use my flash. I like to control my own lighting,” professional portrait photographer, Ernesto Jiménez said in a video about outdoor lighting tips.
If your goal is to make people look their best, soft light is often the safer and more versatile option.
When to Use Each
Hard and soft light isn’t good or bad; it just tells different stories. If you’re shooting a high-energy fitness coach, a hard light might emphasize their strength. If you’re capturing a quiet moment between a parent and child, soft light will likely feel more honest and intimate.
Understanding the emotional tone you’re trying to capture will help you decide which light quality to use and avoid mismatches that make your photos feel off.
Next, we’ll look at another critical piece of the puzzle: how the direction of your light shapes mood and dimension.
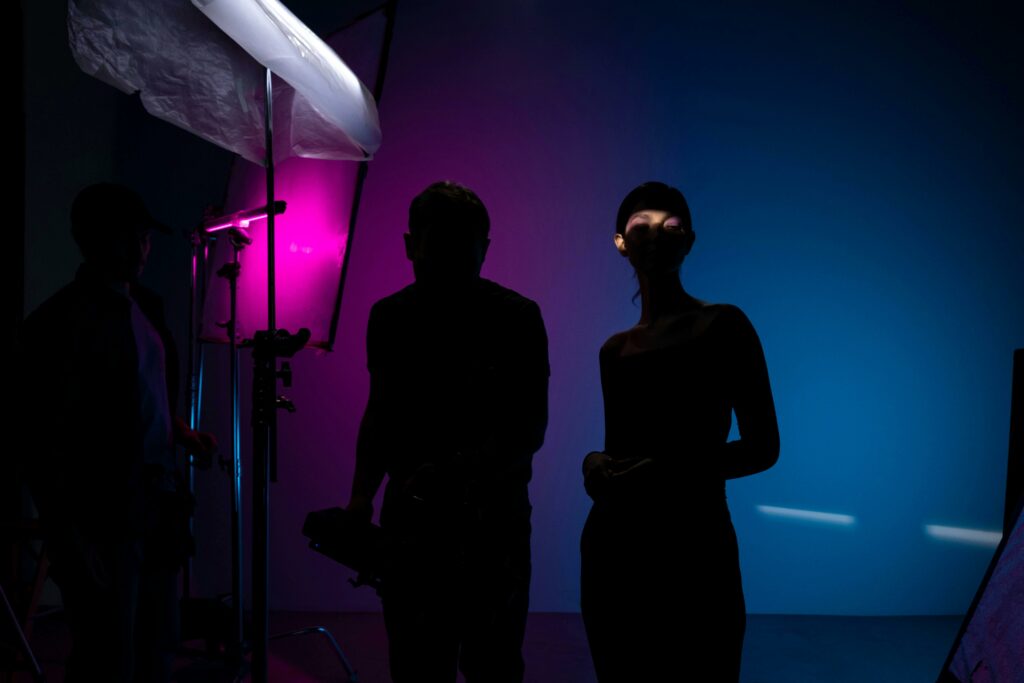
2. Color Temperature: How Light Sets the Emotional Tone
Even when your light is soft and well-positioned, your portraits can still feel off if the color is wrong. Skin might look sickly or unnatural, or the whole scene may feel colder or more clinical than you intended. That’s usually a color temperature issue.
Color temperature refers to the warmth or coolness of the light source. It’s measured in degrees Kelvin, and each range creates a different emotional atmosphere in your image. Understanding how this works lets you use color intentionally, not just reactively.
Warm Light (2,000K to 4,000K)
This range includes candlelight, sunrise, sunset, and tungsten bulbs. It casts a golden or amber glow that feels cozy, romantic, and nostalgic. Warm light tends to soften a scene emotionally, making it perfect for lifestyle sessions, family portraits, and intimate moments.
It can also help smooth skin tones, especially for subjects with warmer undertones. However, if overdone, it can give skin an unnatural orange cast that requires careful balancing in post.
Neutral Daylight (5,000K to 6,500K)
This is the baseline most photographers aim for. It’s balanced and natural, matching midday outdoor light or daylight-balanced LEDs. Skin tones appear accurate, colors stay true, and the overall mood is clean and realistic.
This range works well for nearly every type of portrait. From corporate headshots to editorial work, daylight-balanced lighting gives you maximum flexibility without introducing a strong emotional bias.
Cool Light (6,500K and above)
Cool light has a bluish tint. It’s common in overcast skies, shade, and some LED panels. This tone can feel modern, clinical, or moody depending on the context.
It’s useful for stylized portraits or product-focused shoots where you want a clean, futuristic vibe. But if you’re not careful, it can make subjects look pale or uninviting. Always check your white balance in camera or shoot a gray card reference to avoid surprises in editing.
Matching Light Temperatures
One of the most common mistakes in portrait lighting happens when photographers mix sources without realizing it. For example, combining window light with a warm household bulb can create strange color casts across the subject’s face. Always aim to match the color temperature of all your lights or adjust for it using gels and custom white balance settings.
Use Temperature to Shape Mood
Color temperature is not just a technical detail. It’s a storytelling tool. Use warm light to create connection. Use cool light to suggest distance or control. Use neutral light when you want your subject to feel honest and grounded.
Now that we’ve covered quality, direction, and color, it’s time to talk gear. In the next section, we’ll explore the tools that help shape light, whether you’re using sunlight through a window or setting up a multi-light studio.
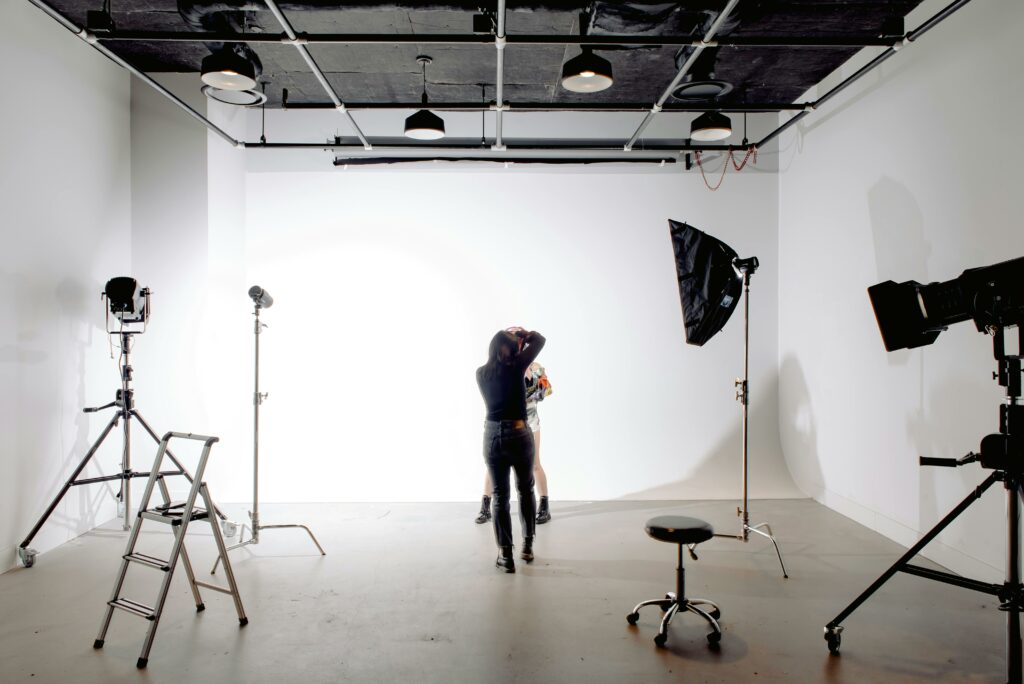
3. Portrait Photography Lighting Equipment
You don’t need a warehouse of photography gear to create beautiful portraits, but you do need the right tools to shape and control light. Many photographers struggle with flat, inconsistent, or overly harsh lighting because they’re working against the environment instead of using simple tools to adapt it.
Let’s break down what you actually need to start lighting more intentionally, whether you’re working with the sun or setting up lights in your studio.
Natural Light Tools: Control Without Electricity
Natural light is beautiful, accessible, and free, but it’s not always predictable. With just a few basic tools, you can make it much more versatile.
Reflectors
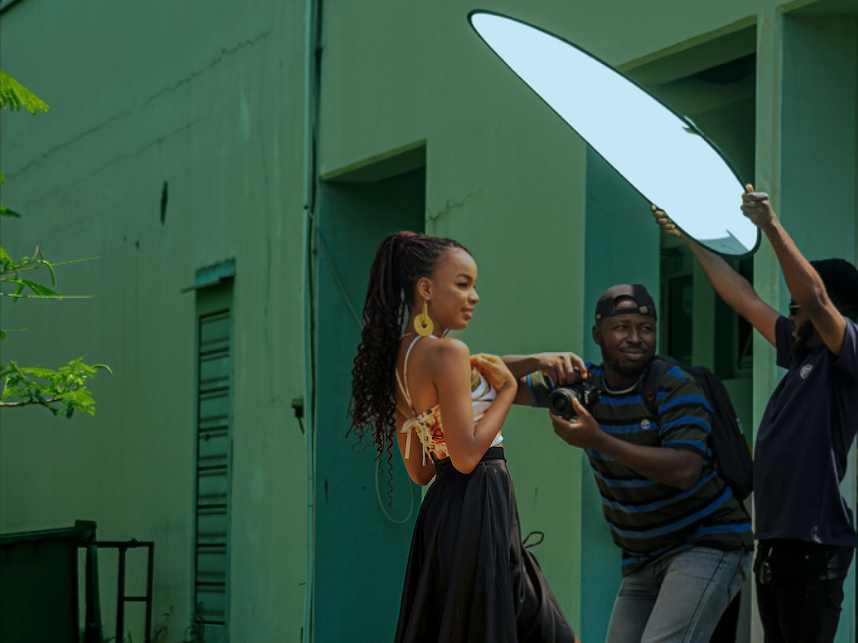
Reflectors are among the most valuable portrait photography tools. They bounce light back onto your subject to reduce shadows and add fill.
- White reflectors provide soft, neutral fill light that looks very natural.
- Silver reflectors create a stronger, cooler fill that adds contrast and sharpness.
- Gold reflectors warm up the scene and flatter many skin tones.
- 5-in-1 reflectors include all of the above, plus a black panel and a diffuser, making them a great all-in-one option.
Diffusers
Diffusers soften harsh sunlight, especially during midday shoots. By placing a translucent fabric between your subject and the sun, you create soft, flattering light even in bright outdoor conditions. They are lightweight, affordable, and easy to pack for location shoots.
Environmental Modifiers
Sometimes the best modifiers are already on location. Sheer curtains can soften window light. A white wall can act as a reflector. Overhangs or shaded areas can block overhead sun and reduce contrast. Learning to spot and use these environmental features is a key skill in mastering natural light.
Artificial Light Tools: Control Without Compromise
Artificial lighting gives you complete control, but it can also feel intimidating at first. The trick is to start simple and build your kit as your needs grow.
Light Sources
There are two primary types of artificial lights for portraits:
- Continuous lights (like LED panels) let you see your lighting in real time. They are great for beginners and hybrid photo-video shoots. Most are daylight-balanced, adjustable, and run cool.
- Strobes and speedlights produce short bursts of light. These are more powerful, portable, and better for freezing motion. A speedlight with a basic modifier is often enough to get professional-looking results on a budget.
Light Modifiers
Modifiers shape the quality and direction of your light. Choosing the right one can dramatically change the look of your portraits.
- Softboxes create a soft, flattering light. Rectangular versions mimic window light, while octagonal versions produce round catchlights in the eyes.
- Umbrellas are quick to set up and provide broad, diffused light. Reflective umbrellas bounce light back, while shoot-through umbrellas send light directly through for a softer effect.
- Beauty dishes offer a mix of soft and hard light. They are ideal for highlighting facial features while keeping a bit of edge and texture.
- Grids and snoots help you direct light more precisely, ideal for adding drama or separating your subject from the background.
- Barn doors give you control over where your light spills, helping you avoid flare and keep your lighting setup clean.
If you’re just getting started, a speedlight and a small softbox or umbrella can completely change your results. As you gain confidence, you can add more lights, modifiers, and controls based on the styles you enjoy shooting most.
4. Lighting Patterns That Shape the Face and the Feeling
Once you’ve mastered how to control the quality and color of light, the next essential skill is understanding direction; how the angle of your light source affects the way light and shadow fall on the face.
This is where portrait lighting patterns come in.
Lighting patterns are tried-and-true setups that shape the mood, dimension, and structure of your portraits. They define how light sculpts facial features, highlights bone structure, and softens or intensifies contrast. When a portrait feels flat or unflattering despite good exposure and gear, it’s often a sign that your lighting pattern needs a subtle shift.
“When there is no clear light source in the scene, your subject’s eyes will not reflect any light. They will look dark. They will look soulless,” Jiménez said in a video explaining common portrait photography mistakes.
Let’s walk through the most common lighting patterns, starting with the boldest and working toward the most universally flattering.
Split Lighting: Bold and Dramatic
Split lighting divides the face into two equal halves, one in light and the other in shadow. It’s intense, graphic, and immediately attention-grabbing.
To create it, place your light source directly to the side of your subject, about 90 degrees from the camera. The line between light and shadow should run right down the middle of the face.
This setup works well for portraits that call for mystery or strength. It’s often used in character portraits, for musicians, and for anyone with strong facial features that you want to emphasize. It’s not ideal for everyone, since it highlights asymmetry and adds a lot of contrast.
Loop Lighting: Balanced and Flattering
Loop lighting is one of the most popular patterns in portrait photography. It creates a small shadow on the cheek opposite the light source, usually under and slightly to the side of the nose. This adds depth while keeping the face mostly illuminated.
To set it up, position your light 30 to 45 degrees to one side of your subject and slightly above eye level. The result is a natural, slightly dimensional look that flatters almost all face shapes.
Loop lighting is great for headshots, family portraits, and everyday sessions that want a polished yet approachable feel.
Rembrandt Lighting: Classic and Expressive
Named after the painter who used it in his work, Rembrandt lighting is defined by a small triangle of light under one eye on the shadow side of the face. It’s dramatic but still soft, adding artistic flair without being too stylized.
To create it, place your light about 45 degrees to the side and slightly above your subject. The shadow from the nose should meet the shadow from the cheek, forming the triangle.
This setup works well for subjects with strong cheekbones or those looking for a moody, cinematic look. It’s popular in editorial and character-driven portraiture.
Butterfly Lighting: Elegant and Glamorous
Butterfly lighting, also known as Paramount lighting, places the light directly in front of and slightly above the subject’s face. This creates a butterfly-shaped shadow under the nose and smooth, symmetrical light across the cheeks.
This is the classic setup for beauty and fashion photography. It flatters symmetrical faces and adds a clean, elegant look. To soften shadows even further, add a reflector just below the face to bounce light upward.
It’s ideal for glamour, beauty, and professional portraits where polish and poise are the priority.
Broad and Short Lighting: Face-Shaping Tools
Broad lighting illuminates the side of the face turned toward the camera, making the face appear wider. Short lighting does the opposite; it lights the side turned away from the camera, which narrows the face and increases contrast.
You can apply these techniques to any lighting pattern by adjusting your subject’s pose relative to your light. Use broad lighting for slimmer faces or to create a friendly, open mood. Use short lighting to sculpt the face or create more dramatic portraits.
“The closer the flash is to the subject, the more contrast you’re going to have. The further your flash is, the less contrast,” Jiménez says.
Rim Lighting: Separation and Depth
Rim lighting places a light source behind the subject, aimed back toward the camera. This creates a glowing outline around the subject’s head or shoulders, separating them from the background and adding depth.
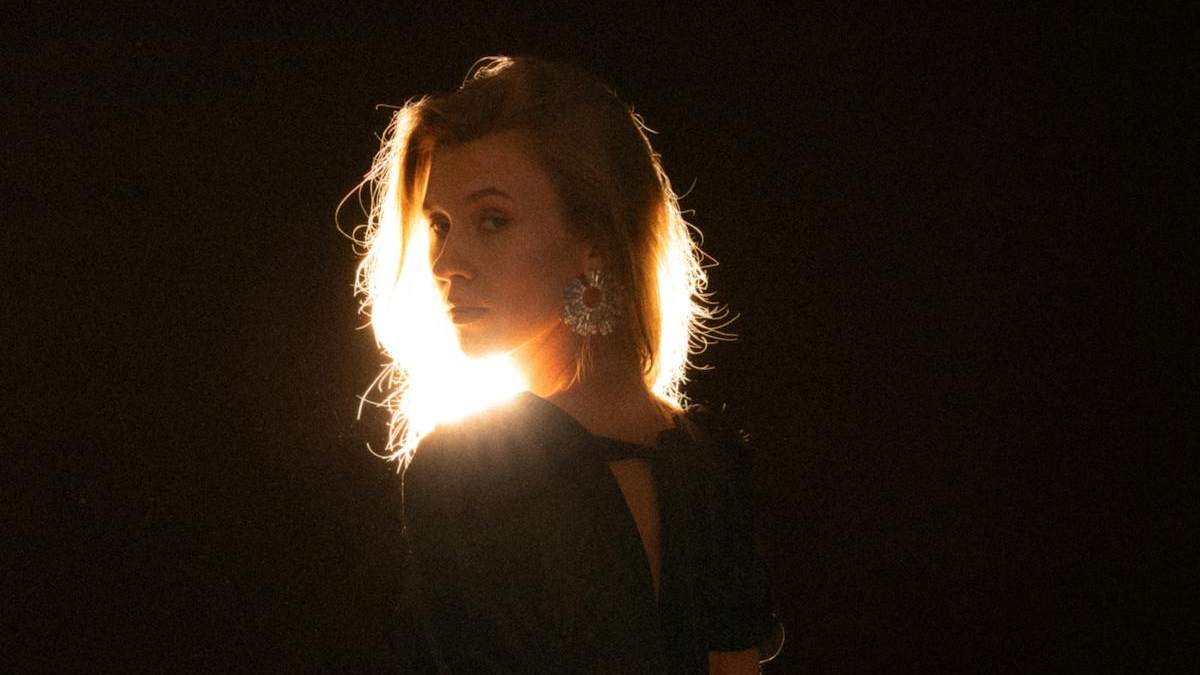
Rim lighting is perfect for creating a cinematic look. It works best when combined with a main light on the face and often benefits from modifiers like grids or barn doors to keep the light focused.
Each of these patterns serves a purpose. Mastering when and why to use them is one of the most powerful ways to improve your portraits. In the next section, we’ll look at how to combine multiple lights to build depth, separation, and more complex visual stories.
5. Building Depth: How to Use a Multi-Light Portrait Photography Setup
A single light can create beautiful portraits, but if your images sometimes feel flat or lack separation between the subject and background, it may be time to explore multi-light setups. Adding even one or two additional lights gives you far more control over mood, depth, and polish.
“Use the sunlight as one of your lights, but also have a flash to be the other light. Like a two-light setup,” Jiménez says.
Many photographers feel overwhelmed by the idea of using multiple lights, but it doesn’t have to be complicated. The key is to understand what each light is doing and to build your setup one light at a time.
The Four Main Lights in a Multi-Light Setup
1. Key Light: This is your main light source and the most important one in the setup. It sets the tone and direction of your light. Typically placed 30 to 45 degrees from the subject and slightly above eye level, the key light defines the shape and mood of the portrait.
2. Fill Light: The fill light controls how deep your shadows are. It is usually placed on the opposite side of the key light and set to a lower power. This prevents the shadows from becoming too harsh and keeps skin tones smooth and balanced. A reflector can also serve this role in a simpler setup.
3. Hair or Rim Light: Placed behind or to the side of your subject, this light helps separate them from the background. It adds a subtle glow to the edges of the face or hair, making the subject stand out more clearly and adding a three-dimensional feel.
4. Background Light: This light illuminates the backdrop, either to bring out texture or create a gradient that frames the subject. It ensures your subject doesn’t appear to float in darkness and allows for more creative control over the environment.
How to Build Your Setup Step-by-Step
Start with just your key light. Take a test shot and adjust the angle and height until the shadows fall in a flattering way. Once you’re happy with the main exposure, add your fill light or reflector to control contrast.
Then bring in your rim light to create separation. Finally, adjust the background light to add context or visual interest behind your subject.
This step-by-step approach helps you understand how each light contributes to the overall image. It also makes troubleshooting easier if something feels off.
When to Use Multi-Light Setups
Multi-light setups are especially useful for:
- Studio portraits where you want full control over lighting
- Professional headshots that need clean, polished results
- Creative editorial work that requires stylized lighting effects
- Product or branding sessions where consistency is critical
That said, you don’t always need all four lights. A two-light setup, such as key plus rim or key plus fill, is often more than enough to create depth and style while keeping things manageable.

6. Portrait Photography Lighting Ideas for Every Skin Tone
One of the most important skills in portrait photography is learning how to light people with different skin tones accurately and respectfully. If your images sometimes look washed out, too contrasty, or lack detail in the skin, it may not be your camera or settings; it’s likely how your light is interacting with your subject.
Skin reflects and absorbs light in different ways depending on its tone. Lighter skin reflects more light and is easier to overexpose.
Darker skin absorbs more light and can be underexposed if you’re not careful. Understanding this helps you make smarter choices about placement, power, and modifiers, so your lighting always feels intentional and flattering.
Lighting Lighter Skin Tones
With lighter skin tones, the biggest risk is overexposure. Because these tones reflect more light, it’s easy to lose texture and detail, especially in soft or frontal lighting. To avoid this:
- Lower your light intensity or move the light further away from the subject.
- Use modifiers like softboxes or umbrellas to gently diffuse the light.
- Add a bit of shadow on one side of the face to create depth and prevent the image from feeling too flat.
- Slightly underexpose your shot and bring back highlights in post if needed.
Lighting Darker Skin Tones
Darker skin is often underexposed by default because it absorbs more light. The goal here is to maintain detail and richness without introducing harsh contrast.
- Move your light slightly closer to the subject or increase the power gradually.
- Use fill light or reflectors to soften shadows, especially on the shadow side of the face.
- Avoid placing your main light directly overhead, which can deepen shadows in the eyes and jawline.
- Pay close attention to your histogram or use spot metering to expose for the skin rather than the background.
One helpful tip is to use white or silver reflectors when working with darker skin. These reflect more light and can help brighten the shadows without adding unwanted color shifts.
White Balance and Color Accuracy
Accurate color is critical when working with diverse skin tones. Mismatched lighting sources or incorrect white balance can introduce unwanted color casts, making skin appear gray, green, or overly warm.
- Set a custom white balance using a gray card when possible.
- Avoid mixing warm and cool light sources unless you are doing so intentionally.
- Keep your post-processing consistent and subtle—over-editing can make skin tones look unnatural or inconsistent.
Lighting Mixed Skin Tones in Group Portraits
If you’re shooting a group with a range of skin tones, the key is to strike a balance. You may need to adjust your lighting slightly to ensure no one is over- or under-lit.
- Use larger modifiers to create broader, softer light that wraps more evenly across faces.
- Feather the light so the edges, not the center, hit the subjects. This softens the overall effect and reduces hotspots.
- Use reflectors or secondary lights to even out any imbalance across the group.
Lighting every skin tone well is a skill that takes practice and attention to detail. But it’s also one of the most meaningful ways to ensure your portraits feel inclusive, professional, and respectful of every subject who steps in front of your lens.
7. Adapting Your Portrait Lighting Technique Based on Age
Great portrait lighting is not one-size-fits-all. What flatters a teenager may not work for a grandparent, and what enhances energy in a child can sometimes feel harsh on mature skin. The way light interacts with facial features changes as people age, which means your lighting strategy should adjust accordingly.
If your portraits of older subjects feel too contrasty or unflattering, or if younger subjects appear too flat or overlit, chances are your lighting needs a few thoughtful tweaks. Here’s how to tailor your setup by age for more flattering, expressive portraits across generations.
Lighting Older Subjects
As skin matures, it tends to develop more texture, and facial features often become more pronounced. The goal here is to create a soft, flattering look without removing all dimension.
- Use large, diffused light sources, such as softboxes or umbrellas, to create even, gentle light across your face.
- Position your light slightly higher and closer to the subject to smooth features without creating unflattering shadows under the eyes or chin.
- Avoid strong side lighting, which can accentuate lines and skin texture. Instead, go for a more frontal angle with slight direction to retain natural depth.
- Reduce contrast either through a fill light or a white reflector to lift shadows and keep the lighting balanced.
“The closer you have your main light to your subject, the harsher the shadows are going to be… the further your main light is, your shadows are going to get grayer, not as harsh,” Jiménez said.
This approach works well for individual portraits, legacy sessions, or professional headshots for older clients who want to look polished but natural.
Lighting Younger Subjects
Younger skin reflects light more evenly and tends to have fewer texture concerns, giving you more creative flexibility. This is a great opportunity to play with mood and contrast.
- You can use stronger lighting angles to emphasize bone structure or mood without worrying about exaggerating texture.
- For high-energy sessions, such as teen portraits or personal branding, you might introduce more directional lighting to add visual interest.
- Try butterfly or loop lighting for a classic look that flatters without over-softening.
In youth sessions, feel free to let your creativity shine. The lighting can be more dynamic as long as it supports the subject’s personality and style.
Balancing Light in Mixed-Age Group Portraits
Family portraits often include people of different ages, which makes lighting more challenging. You need to find a middle ground that flatters everyone.
- Use a broad, soft light source to light all faces evenly.
- Feather the light slightly so the edges reach each subject gently, avoiding hotspots or uneven shadows.
- If needed, use a reflector or secondary fill light angled toward older family members to minimize contrast and soften facial features.
A balanced setup ensures no one is underlit or overly highlighted, making the group look cohesive and well-lit.
8. Portrait Photography Workflow
Even when you understand lighting patterns and have the right gear, getting consistently strong results depends on your workflow.
Many photographers struggle with portraits that feel rushed, uneven, or hard to replicate. That usually comes down to skipping steps or reacting to problems instead of preparing for them.
A thoughtful workflow brings structure to your creative process. It helps you anticipate challenges, adapt to the environment, and deliver images that feel polished and intentional, no matter where or who you’re shooting.
Before the Shoot: Planning with Lighting in Mind
Your lighting decisions start long before you press the shutter. Take time to understand the needs of the shoot and the qualities of the space you’ll be working in.
- Ask questions during your client prep: What mood do they want to create? Do they have reference images? Are we going for bold, clean, dramatic, or soft?
- Scout your location with light in mind: If it’s a studio, note wall colors and ceiling height. If it’s on-location, visit at the same time of day you plan to shoot. Observe where natural light falls and how you might shape or supplement it.
- Pack based on the lighting plan: If you know you’ll be in a small space, bring compact modifiers. If it’s an outdoor session with harsh sun, pack a diffuser or scrim. Always bring backups: batteries, triggers, extra bulbs.
Setup and Testing: Dial In Before the Client Arrives
One of the most common mistakes photographers make is setting up while the client is on set. This not only adds pressure but also limits your ability to fine-tune lighting.
- Arrive early and give yourself enough time to build your setup from the key light out.
- Test each light individually so you can see its effect in isolation. This helps you troubleshoot more easily if something looks off later.
- Use a stand-in (yourself or an assistant) to evaluate how the light wraps around the face. Adjust light height, angle, and distance until shadows and highlights fall where you want them.
- Take reference shots. These can help you recreate lighting across multiple sessions or locations.
During the Shoot: Adjust in Real Time
Even a perfect plan needs to flex once the subject steps into the frame. Skin tone, clothing, facial structure, and pose can all affect how light interacts with the skin.
- Watch how light hits different sides of the face as your subject moves. Minor adjustments in their angle or your light position can drastically change the look.
- Adapt lighting patterns to match the mood or expression. A confident, direct look might benefit from short Rembrandt lighting, while a softer pose might call for butterfly or loop lighting.
- If your subject has reflective glasses, oily skin, or textured areas that catch too much light, consider lowering the light, adding diffusion, or using a fill to balance the contrast.
The most successful photographers don’t rely on a single lighting trick. They build repeatable systems that can be tweaked and adapted in any environment.
By taking the time to plan, test, and adjust throughout your session, you’ll set yourself up for stronger images from the start and less work afterward.
Up next, we’ll close with how Aftershoot can help you carry that same lighting precision into your post-processing, saving time and helping you stay true to your creative vision.
Finish Strong with AI-Powered Post-Processing
Lighting is where the story begins, but editing is where it all comes together. With Aftershoot’s AI-powered retouching, you can instantly enhance your portraits, preserving the essence of your creative vision. Whether you’re fine-tuning skin tones, smoothing contrast across a multi-light setup, or batch-editing dozens of portraits, Aftershoot helps you get through the work faster without compromising quality.
Aftershoot’s AI Editing is designed to carry your creative intent from capture to delivery. By learning your personal editing style, you can automatically apply consistent adjustments across thousands of images while preserving the subtle highlights, shadows, and color temperatures that define your lighting decisions.
You stay in control of the look. The portrait editing software you use just speeds up the process, letting you focus on what matters most—creating stunning portraits that reflect your unique style.
Ready to take your portrait editing workflow to the next level? Start your free trial of Aftershoot today.