Every October, photographers everywhere dust off their fog machines and orange gels and end up shooting the same pumpkin-headed portraits. The internet is full of them.
But what separates the memorable Halloween photo from the forgettable one isn’t the costume. It’s the mood, the lighting, and the story you build around the shot.
As Expert Photography puts it, “Great Halloween photography doesn’t always need a big budget or professional models. You can take creepy photos of anything with the help of moody lighting, scary locations, and props.” That’s exactly what this guide is about: creative Halloween photography ideas to help you shoot haunting images that clients remember (and book mini-sessions for year after year).
TL;DR: Quick Wins for Halloween Photos
- Mood > Costume: Let light and shadow do the heavy lifting.
- Prep early: Low-light shoots, smoke, and kids all need planning.
- Keep it efficient: Batch your post-work with AI tools like Aftershoot can speed culling, editing, and retouching so you deliver fast.
- Use the season: Mini-sessions and spooky themes are an easy revenue bump for portrait and family photographers.
How to choose the right Halloween concept
Start with who you’re shooting. Now this is important because a kids’ pumpkin-patch mini-session is a different universe from a horror-themed portrait.
Jessops’ product specialist Lizzie James puts it perfectly: “Your location does half the work for you when it comes to taking photos, creating a haunting atmosphere without needing excessive props or setups.”
Ask yourself:
- What emotion do I want? eerie, playful, cinematic, or dark comedy?
- What time of day fits that mood? (Sunset or blue hour = automatic atmosphere.)
- How much can I control the light and environment?
- Can I shoot it efficiently enough to deliver fast?
If you can answer those, you already have a concept, the rest is execution.
Top Halloween photography ideas for 2025
1. Spooky portraits in low light
This is where Halloween photography lives—candlelight, lanterns, a subject half-lit, half-lost in darkness.
- Keep a single light source (candle, lantern, phone screen) close to your subject.
- Use a fast lens (f/1.8–2.8) and shoot RAW.
- Expose for the highlights, let shadows fall.
Jessops advises, “In these lighting conditions, you may need to use a slower shutter speed to allow more light into the camera… That’s where a tripod becomes a lifesaver.”
2. Props + smoke for instant atmosphere
Smoke bombs, lanterns, fog machines: the easiest way to build depth without huge setups.
- Position smoke behind your subject and light it from the side or back.
- Use a flashlight or small LED for rim light.
- Keep the subject still while smoke moves for that ghostly motion blur.
As KraftGeek notes, “Halloween photography demands more than basic pumpkin-head portraits. Creative photographers seek techniques that capture genuine atmosphere and emotion.”
That atmosphere is the sell. It’s what gets people to book Halloween sessions again next year.
3. Silhouettes and shadows that tell a story
Silhouette photos are simple but powerful. They strip away everything except shape and story. If you’re short on gear, silhouettes are your friend.
- Place your subject between you and the light (sunset, streetlamp, window).
- Meter for the background.
- Look for strong shapes: witch hats, brooms, capes.
Pro Insight: We saw photographers on Reddit often pair silhouettes with slow shutter movement: one exposure for the static figure, one for motion. The result feels cinematic and slightly surreal.
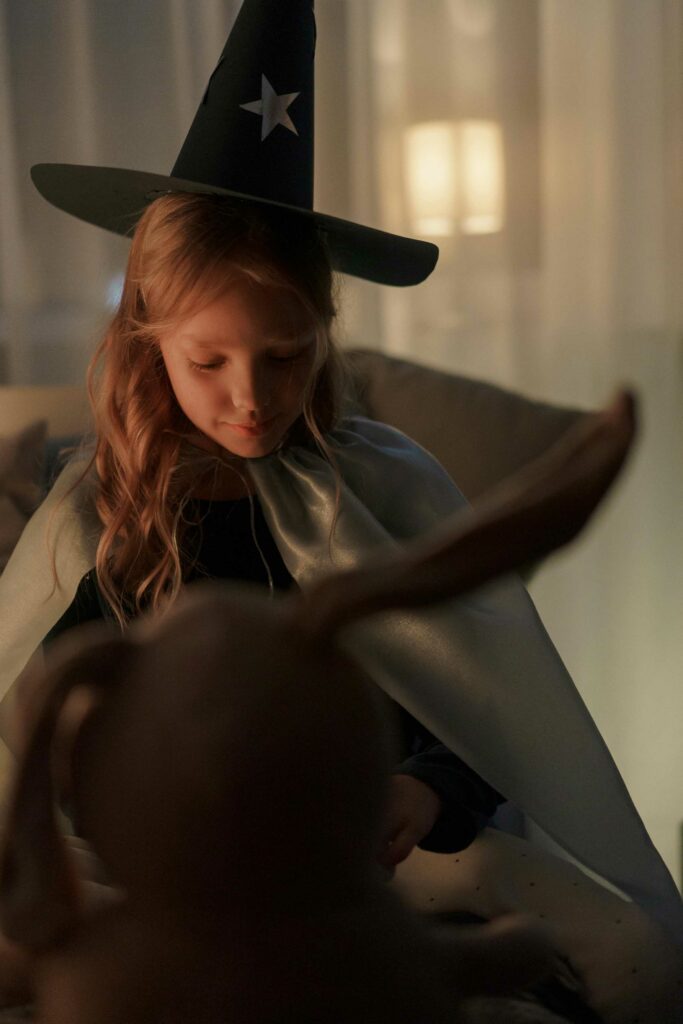
4. Kids, pets & family mini-sessions
Mini-sessions are where most working photographers make Halloween worth it. Families love Halloween shoots, but kids and pets have a two-minute attention span.
- Keep the setup simple: decorated porch, park, pumpkin patch.
- Use continuous light or soft on-camera flash.
- Focus on movement: trick-or-treating, running, laughter.
5. Let the Location Be the Character
Haunted forest, old house, neon street—let the backdrop do half the storytelling.
Scout at the same time of day you’ll shoot, and find built-in light sources (windows, signs, lanterns). Even an ordinary alley can look cinematic at blue hour with the right fog or colour cast.
Pro Insight: A street photographer in Toronto wrote, “I shoot all my Halloween sets in the same alley, just change gels and props each year. Clients think it’s a new set every time.”
6. Editing for spook factor
What you do in post can make or break the vibe.
- Start by pulling highlights down, shadows up—preserve detail.
- Desaturate slightly
- Add a bit of grain, split-tone cool shadows, and warm highlights.
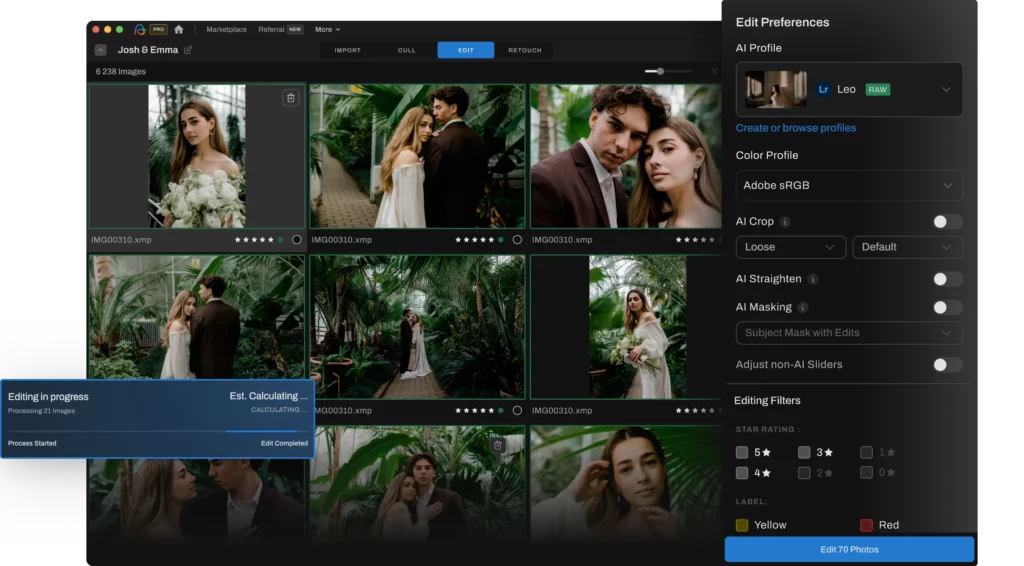
Batch culling and editing is where you’ll save time here. Import everything into Aftershoot, let AI culling flag the best shots from your set. Aftershoot edits can apply your preferred Halloween editing style across an entire set, so your look stays consistent without manual tweaking. Then do final creative touches (textures, overlays) in Lightroom or Photoshop. Your turnaround time (and sanity) will thank you.
Pro Insight: A user on r/Lightroom said, “My trick for Halloween edits is lowering clarity slightly and adding fog overlays. It hides imperfections and makes everyone look like they’re in a movie.”
Read also: AI Culling vs Lr Culling: The Ultimate Face-Off
Halloween photoshoot examples (and how to shoot each look)
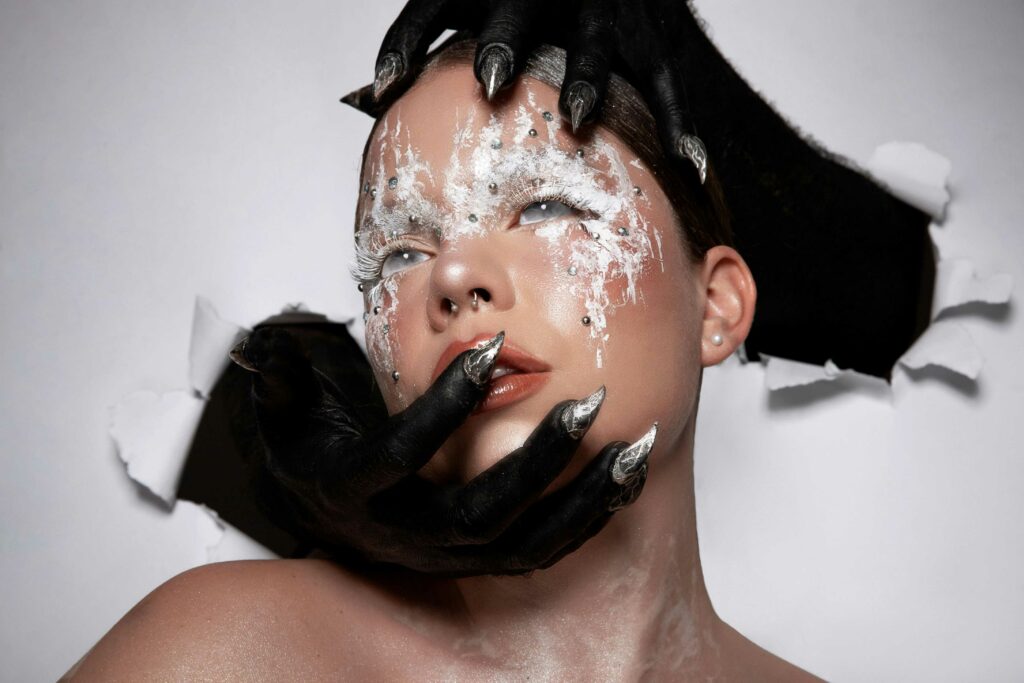
Horror beauty portrait
Use a single softbox or beauty dish at 45° to the subject to sculpt shadows and highlight texture. Position black-gloved hands through a paper backdrop for a layered, tactile composition; f/4 for detail retention.
Cozy witch child portrait
Shoot at f/2.0–f/2.8 using available indoor light and a warm white balance (~3800K) for atmosphere. Place a dim lamp behind the subject for soft backlight separation; expose for skin tones to maintain warmth.
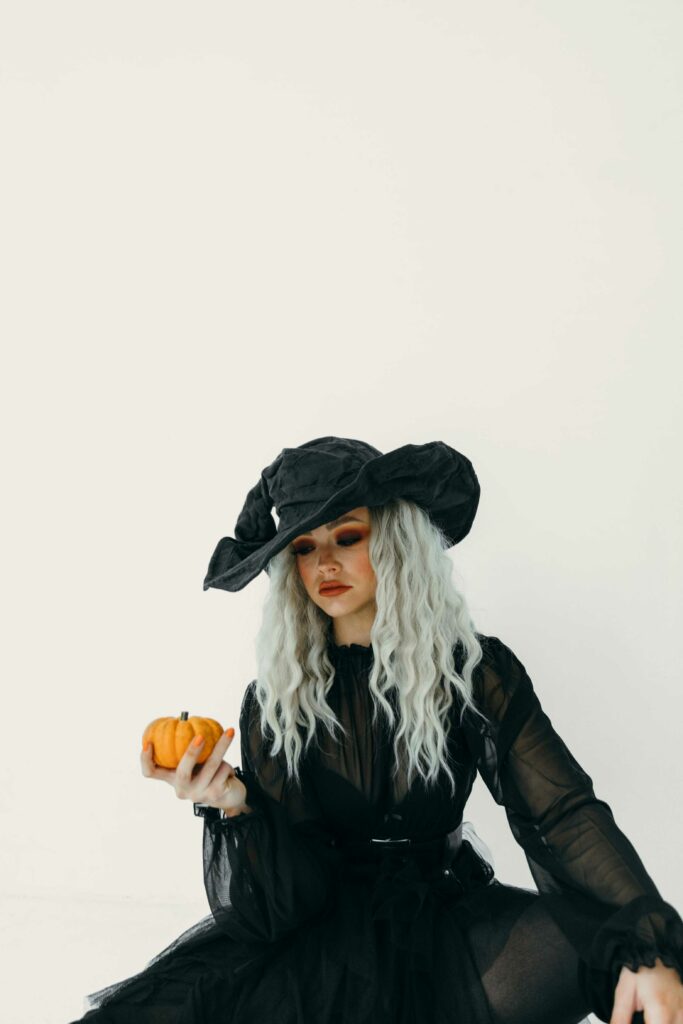
Modern witch editorial
Use natural window light diffused by sheer curtains or a large white reflector for clean, even tones. Frame at mid-chest to emphasize costume details, keeping background pure white for contrast against dark attire.
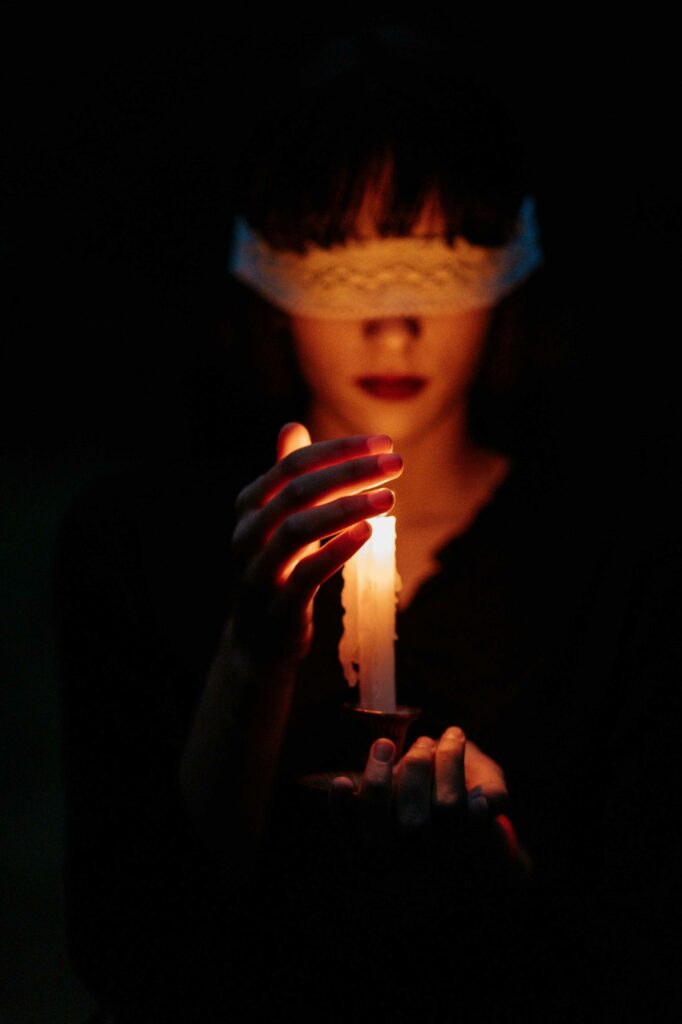
Candlelight moody portrait
Shoot at f/1.8, ISO 800–1000, using the candle as the key light source for authentic warmth.
Keep hands close to the flame to catch falloff; meter for highlights to preserve glow without clipping.
Workflow & Gear for Fast Halloween Turnarounds
Halloween means low light, high chaos. Streamline what you can.
Recommended setup:
- 35 mm f/1.4 or 50 mm f/1.8 lens
- Small LED panel or flashlight
- Tripod for long exposures
- Portable reflector (silver/white)
Here’s a quick guide on using a 35mm effectively for portraits
Halloween photography workflow
Step 1: Cull in Aftershoot – the AI can group duplicates and pick the best focus/expression.
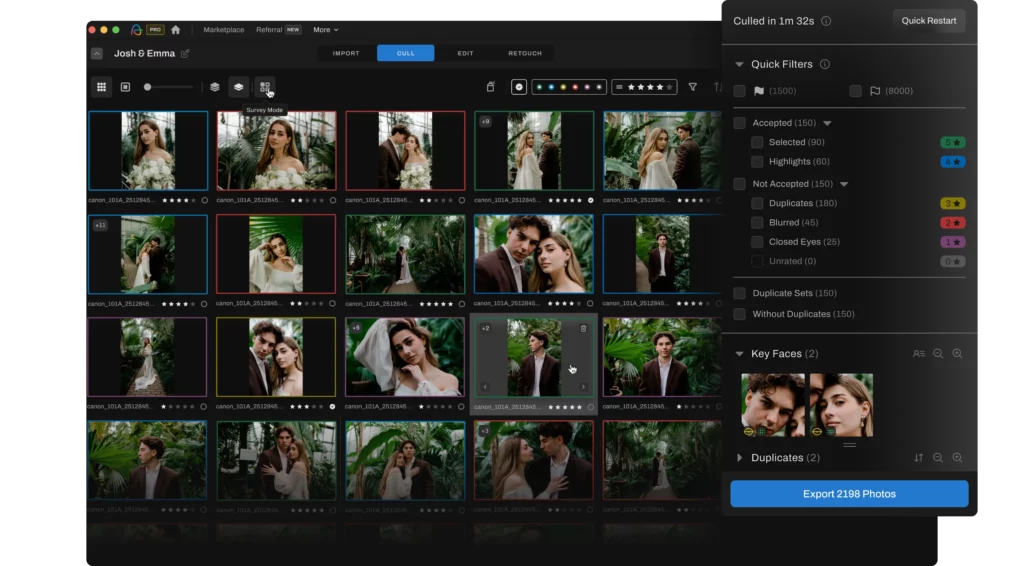
Step 2: Apply your base look in Aftershoot Edits and export to Lightroom for fine-tuning
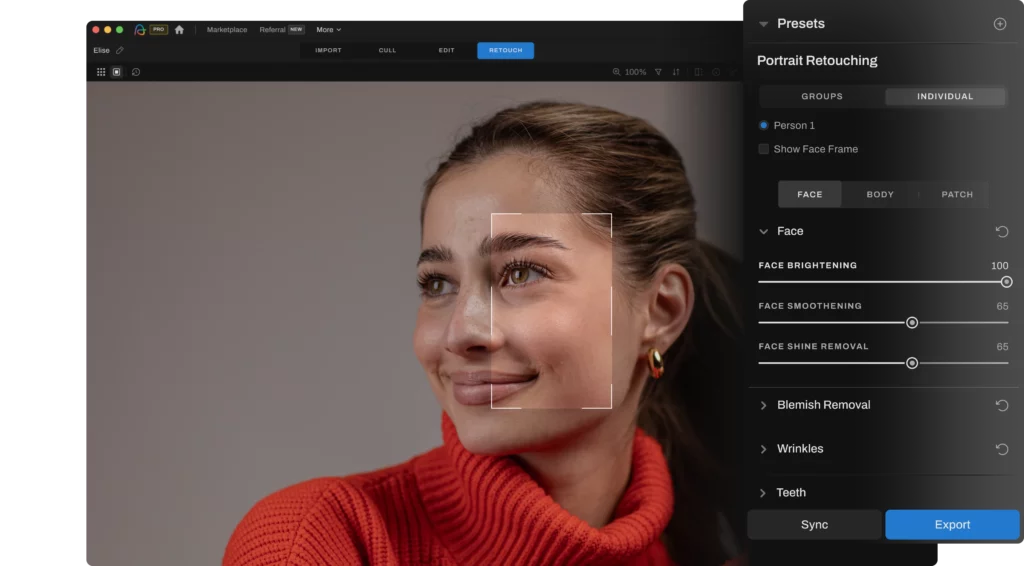
Step 3: Use Aftershoot retouching: remove skin imperfections, flyaways instantly, to get you 90% there. Export to Ps (if needed) for fining touches
Step 4: Export (to your platform of choice), watermark, and deliver via online gallery before Halloween night ends.

Your goal: fast turnaround. Nobody wants spooky photos in November. When clients get spooky photos before Halloween night, you win trust (and repeat work).
One family photographer said, “After I automated my culling, I could turn around 12 Halloween mini-sessions in a single weekend. Parents were shocked I delivered in 48 hours.”
Business Tips: Package Profitable Halloween Mini-Sessions
Halloween is the perfect excuse for mini-sessions, themed portraits, and pet shoots all sell but how you package them matters.
Mini Session Package Example
Keep them simple and repeatable:
| Session length | 10–20 minutes |
| Deliverables | 5–10 edited photos |
| Turnaround | Within 48 hours |
| Price range | $125–$250 (depending on market) |
Add-ons like prints, additional edits, or quick composites can bump revenue 20–30%.
Start promoting by early October with clear time slots and limited seats. Use:
- Instagram Reels showing setup behind the scenes
- Facebook group posts for local parents and pet owners
- Email list countdowns (“Only 5 slots left for Saturday’s Spooky Minis”)
How to sell them:
- Announce “15-minute Halloween sessions” with props provided.
- Include 5 edited images, deliver within 24–48 hours.
- Use Aftershoot to deliver faster than anyone else—clients notice speed almost as much as quality.
The real secret to great Halloween photography
Every Halloween, photographers chase bigger props, crazier costumes, and louder concepts. But the real magic is in the mood.
So, build your story through light, composition, and character. Use the tools that take the repetitive stuff off your plate, like Aftershoot so you can focus on the creative parts that actually matter.
Pick one idea from this guide, set up a test shoot this week, and create something hauntingly beautiful. Your future clients (and your October calendar) will thank you.
FAQ: Halloween Photography Essentials
What time of day is best for Halloween photos?
Golden hour into blue hour (just before and after sunset). After dark, use lanterns or LEDs for moody contrast.
What are ideal camera settings for low-light Halloween shoots?
Start at f/2.0, 1/125 sec, ISO 800–1600. Adjust ISO as needed, grain fits the vibe anyway.
How can I make Halloween photos look spooky in editing?
Cool your white balance, lower saturation, add fog or grain overlays, and slightly fade the blacks.
How do I keep kids or pets engaged?
Keep the shoot moving. Let them act out “monster walks” or short poses. Two minutes of chaos = perfect candid energy.
How can I edit fog realistically?
Use radial gradients in Lightroom to lift exposure behind your subject, or overlay subtle smoke textures in Photoshop.