Face Portrait Photography: A Complete Guide for Photographers
When you think of face portrait photography, imagine the power of a single glance that…
Posted by Team Aftershoot
Updated: February 2, 2026
Chapters
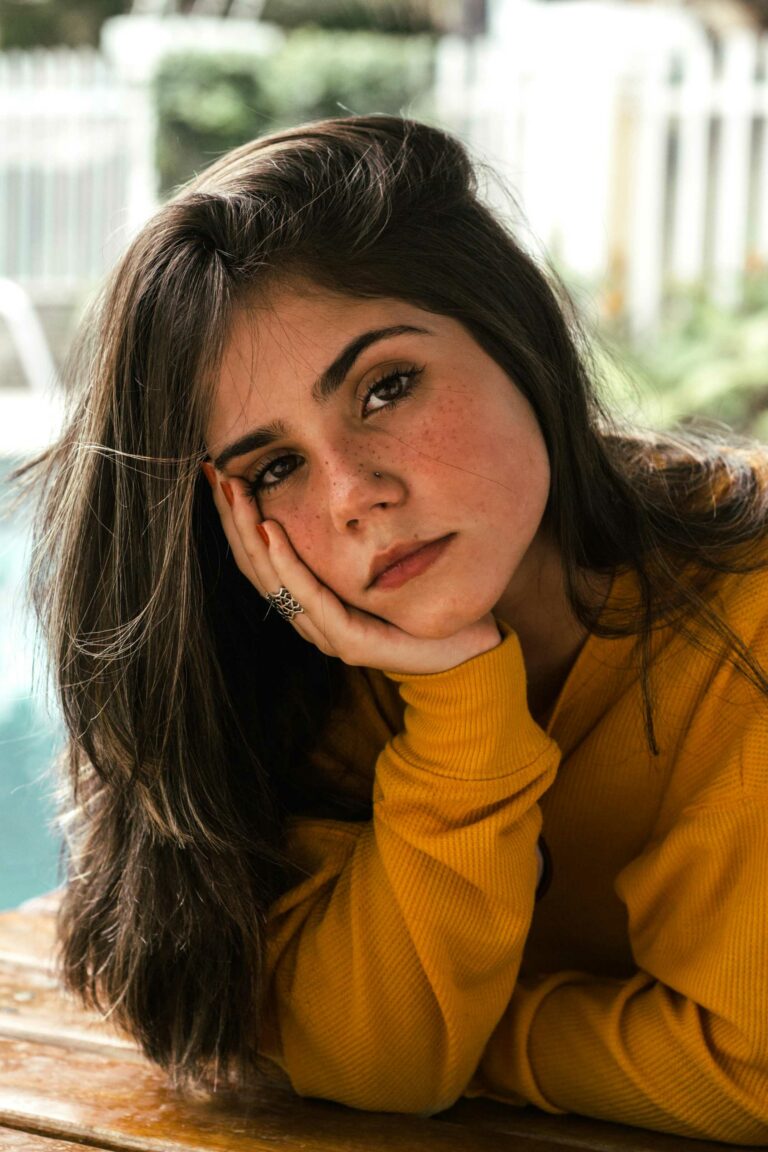
When you think of face portrait photography, imagine the power of a single glance that tells an entire story. This style focuses exclusively on facial features, expressions, and the subtle details that make each person unique. It’s chosen by clients who want striking, personal images that capture their authentic selves, from corporate professionals needing headshots to individuals celebrating life milestones.
Face portrait photography focuses on the face as the primary storytelling element, using light, expression, and framing to communicate personality without relying on body language or environment. With its emphasis on precise lighting, careful composition, and genuine connection with your subject, face portrait photography turns a simple headshot into a compelling character study. In this guide, we’ll break down everything you need to know about shooting, editing, and delivering stunning face portraits, plus how modern AI tools can streamline your workflow without sacrificing that personal touch.
TL;DR
The shift is from “smile and look at the camera” to “let’s capture who you really are.”
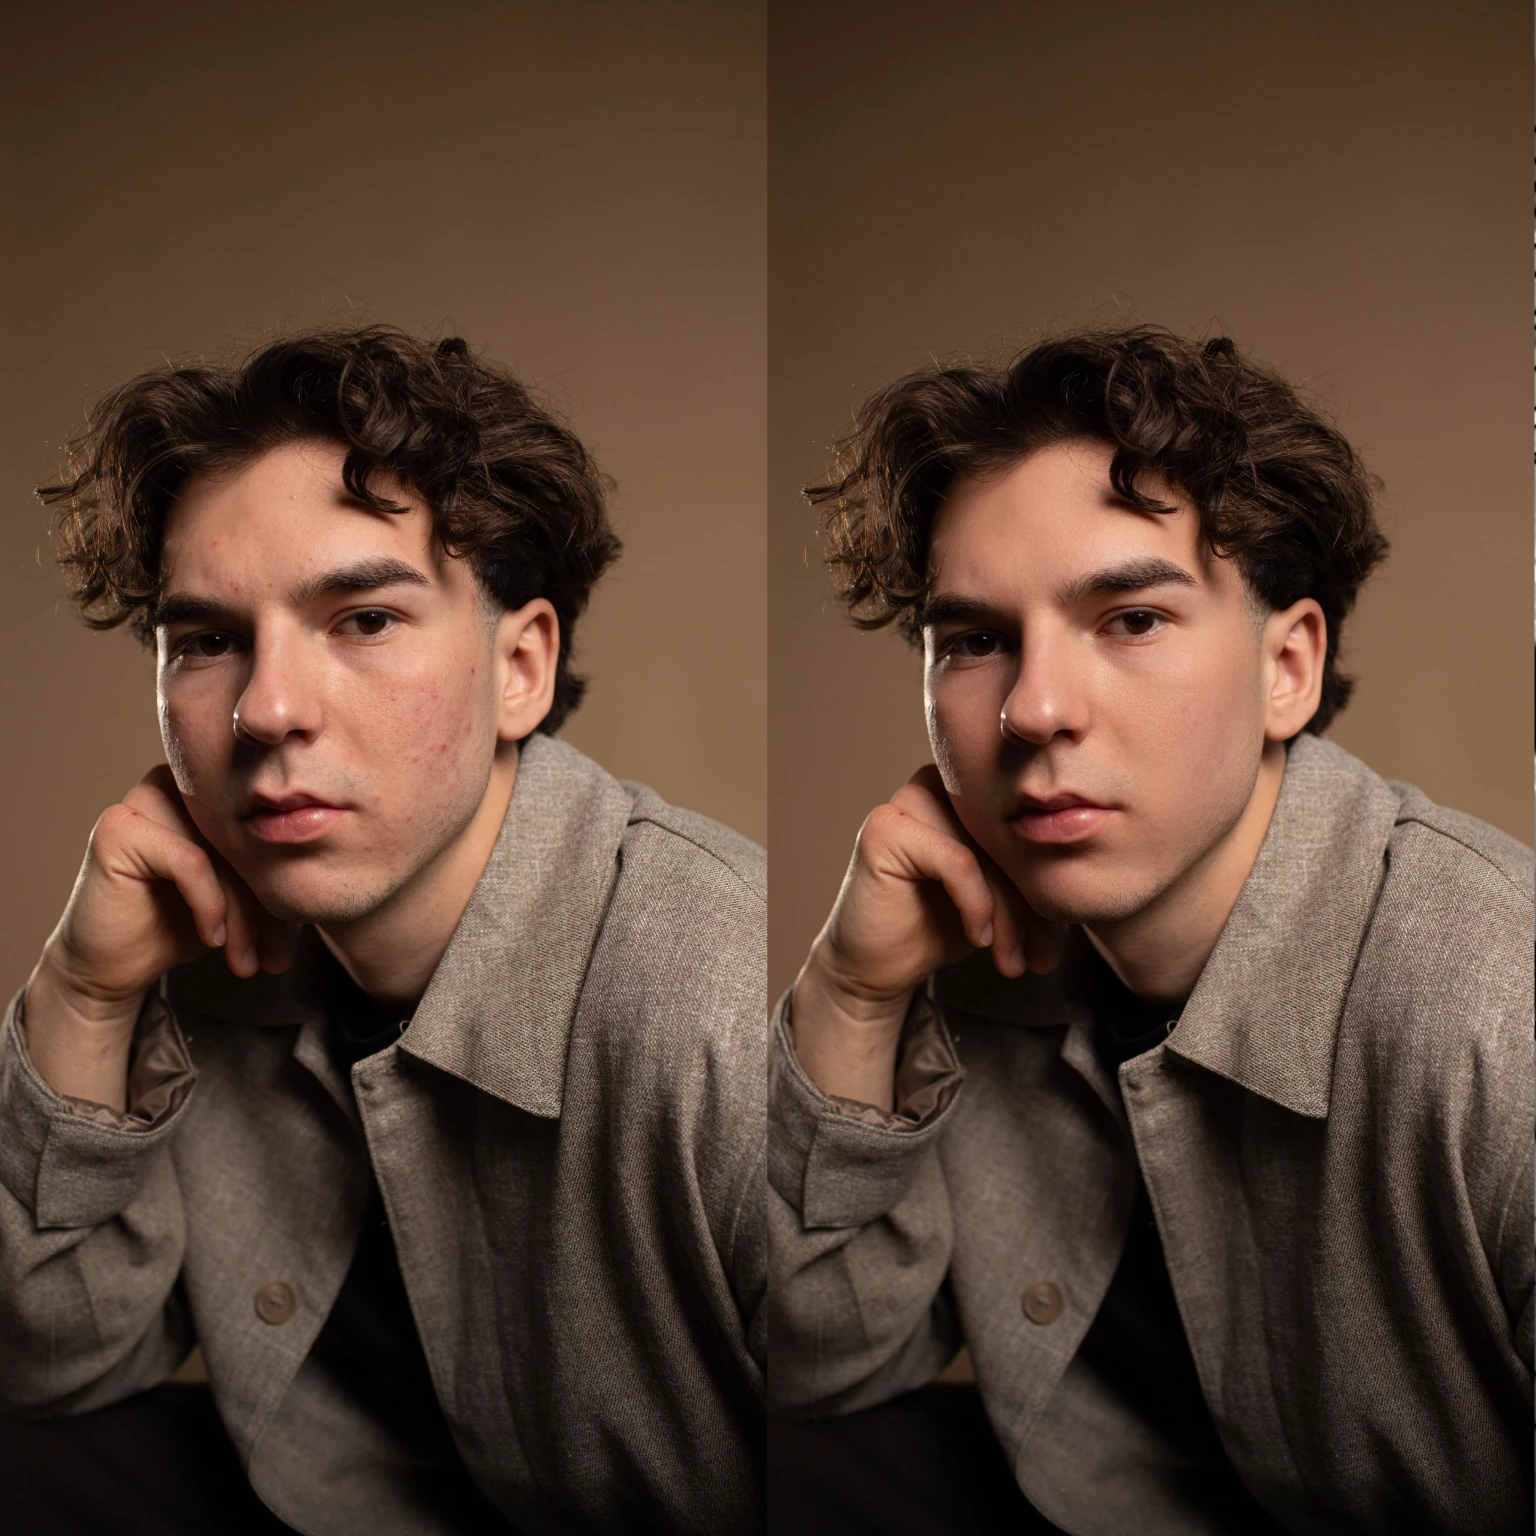
Face portrait success requires technical precision – perfect focus, flattering lighting, and careful attention to details like catchlights and skin texture.
Building genuine rapport with subjects is as important as camera settings; authentic expressions can’t be faked.
Post-processing leans toward natural enhancement – smoothing skin while preserving character, enhancing eyes without overdoing, and maintaining realistic skin tones.
Tools like Aftershoot’s AI Retouching have become integral as it helps maintain consistency across portrait sessions while preserving that natural, authentic look clients expect.
Face portrait photography: Gear, setup & lighting tips
Here’s what every face portrait session demands:
Essential camera gear:
85mm-135mm prime lens – The sweet spot for flattering facial proportions without distortion. An 85mm f/1.4 creates beautiful background separation while keeping facial features natural.
50mm lens for tighter spaces or when you want a more intimate feel
Camera with excellent low-light performance for natural window light scenarios
Lighting equipment:
Large softbox or umbrella (36-inch minimum) for soft, wraparound light that minimizes harsh shadows
Reflector (white, silver, or gold depending on desired warmth) to fill shadows and add catchlights
Key light positioned at 45-degree angle to create flattering Rembrandt or loop lighting patterns
Camera settings starting points:
Aperture: f/2.8-f/5.6 – Wide enough for subject separation, narrow enough to keep facial features sharp
Shutter Speed: 1/160s or faster to eliminate camera shake and capture sharp expressions
ISO: 100-800 depending on available light, prioritizing image quality over speed
Focus and composition:
Always focus on the nearest eye – If your subject is angled, the eye closest to camera must be tack sharp
Leave breathing room above the head and don’t crop at awkward joints
Watch your backgrounds – Even with shallow depth of field, distracting elements can pull attention from the face
Client communication and expectations: Start with a consultation to understand what the client wants to communicate through their portrait. Are they building a personal brand? Updating LinkedIn? Celebrating a milestone? This conversation shapes everything from wardrobe choices to final editing style.
Send a pre-session guide covering wardrobe suggestions (solid colors, avoiding busy patterns), grooming tips, and what to expect during the session. This prevents last-minute stress and ensures better results.
Location and setup planning: Scout your location in advance, whether it’s your studio or an on-location shoot. For face portraits, you need controlled lighting conditions such as large windows with consistent light, or the ability to set up artificial lighting without distractions.
Create a simple shot list focusing on different angles, expressions, and lighting setups. Face portraits benefit from variety: straight-on shots, slight angles, profile views, and different emotional expressions from serious to genuine smiles.
During the Shoot
Building rapport and directing: Face portraits live or die on authentic expressions, which only happen when your subject feels comfortable. Start with conversation – ask about their work, interests, or reason for the shoot. The goal is to get them talking and relaxed before you even pick up the camera.
Give clear, specific direction: Instead of “smile,” try “think about something that makes you genuinely happy” or “imagine you’re seeing an old friend across the room.” These prompts create natural expressions rather than forced poses.
Technical shooting approach: Work systematically through your lighting setups. Start with your key light at 45 degrees to create depth and dimension. Watch for catchlights in both eyes – they bring life to the portrait and create connection with viewers.
Shoot in bursts during conversation and direction changes. Authentic expressions happen between poses, not during them. Don’t just capture the smile, capture the moment just before it, when the expression is building naturally.
Managing common challenges:
Blinking: Shoot in continuous mode during direction changes
Uneven lighting: Use your reflector to fill shadows, especially under the eyes
Camera awareness: Keep talking while shooting to maintain natural expressions
Posture issues: Guide shoulder positioning and head angles for flattering results
Post-Processing workflow for face portrait photography
Great face portraits are won or lost in post. The photographers who scale portraits profitably don’t obsess over every pixel; they build a workflow that protects their time and their aesthetic.
Here’s what that actually looks like in practice.
Step 1: Cull for expression and eye contact
Face portraits live and die by micro-expressions. A technically sharp frame with dead eyes is useless, while a slightly imperfect shot with real connection often becomes the client’s favorite. And manually sorting 300–600 near-identical frames just to find that expression is where most photographers start banging their heads on the wall (haha!). This is where AI culling earns its keep. Aftershoot’s AI culling helps surface:
The strongest expressions (eyes open, natural smiles, relaxed faces)
Near-duplicates where the only difference is a blink or micro-shift
Misses you’d normally waste time second-guessing
Step 2: Apply a consistent base edit before retouching
Before you touch skin, you need a clean, neutral base. Exposure, white balance, contrast, and color need to be consistent across the set or your retouching will fight you the whole way.
AI editing works well here because portrait sessions are controlled environments. Similar lighting, similar distances, similar skin tones. Aftershoot can apply a consistent editing style across the gallery, so you’re not correcting exposure image by image before retouching even starts.
Once the base edit is solid, retouching becomes faster and far more surgical.
Step 3: Retouch faces in batches
This is where most photographers either overwork images or burn out. High-end face retouching is a problem you literally solve hundreds of times per week. And that requires efficiency at scale. AI retouching tools inside Aftershoot help automate the repetitive parts, such as blemish and temporary skin issue removal, subtle skin smoothing without plastic texture, even skin tone correction across a set, fix stray hairs etc. What it doesn’t try to do is replace your judgment.
The smart play is to adopt a hybrid portrait retouching workflow, which means you let AI handle baseline retouching on the full set, then manually finesse the 5–10 images that clients will print, frame, or use for branding. That’s how professional portrait photographers keep quality high without spending 20 minutes per face.
Step 4: Final Human Pass
Once AI has handled culling, base edits, and baseline retouching, your final pass becomes intentional instead of exhausting. This is where you bring your photos into Lightroom or Capture One to:
Fine-tune eyes and catchlights
Adjust skin tone selectively
Make creative decisions that AI shouldn’t touch
Face portraits require careful color balance to ensure natural, flattering skin tones across different lighting conditions. Avoid over-saturation that makes skin look unnatural, and pay attention to color casts from mixed lighting sources.
Popular editing aesthetics in face portraits
Film-inspired edits are increasingly popular for personal branding portraits, offering slightly lifted shadows, warm skin tones, and a subtle grain that adds character.
For corporate headshots, crisp and clean processing with neutral color grading ensures the portraits look professional across different platforms and printing applications.
How much does face portrait photography make?
Individual sessions: $200–800; $400–1,200 in major markets.
Corporate packages: $150–500 per person, depending on volume.
High‑end branding/executive work: $800–2,500 with outfit changes, locations, and extensive retouching.
Growth potential: Short sessions with premium pricing make this niche scalable. A great headshot often leads to family, branding, or corporate work, with clients returning every 2–3 years for updates — creating steady, repeat business.
Mastering face portrait photography
Success comes from a repeatable system that delivers consistent results without post‑processing burnout. You just need a reliable setup, confident direction, and an efficient workflow.
Aftershoot handles the tedious culling, editing, and retouching so you can focus on capturing authentic expressions and building client relationships.
Work smarter, deliver faster, and grow your business. Try Aftershoot free for 30 days and see how AI can transform your portrait workflow.
A bi-monthly newsletter for photographers who want more than surface-level advice. Get thoughtful insights, honest takes, and real strategies to grow your business and stay creative.