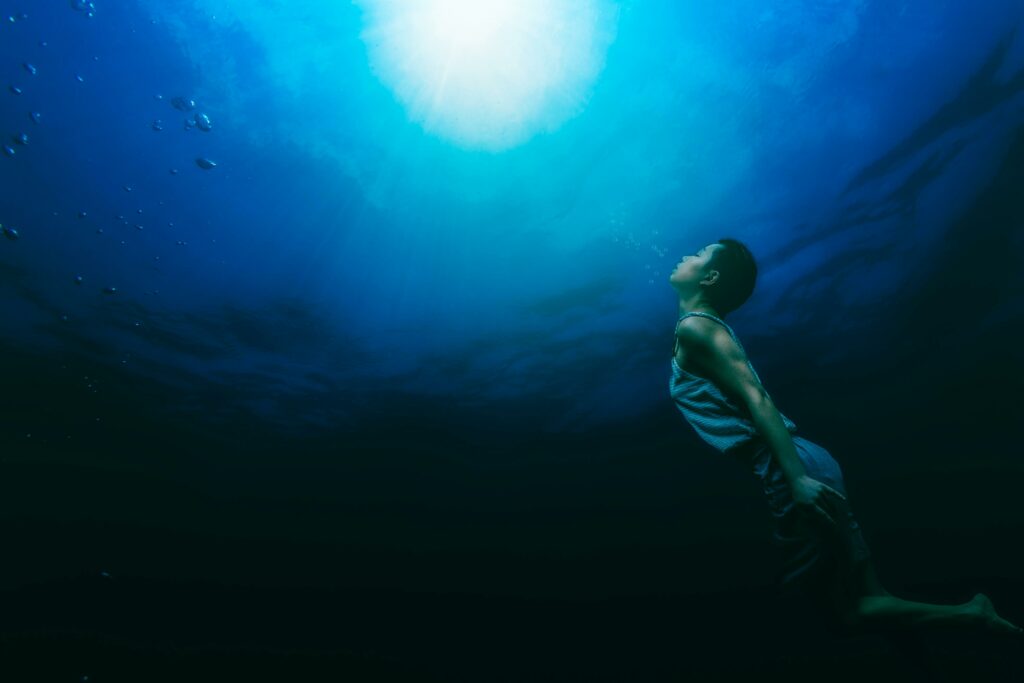
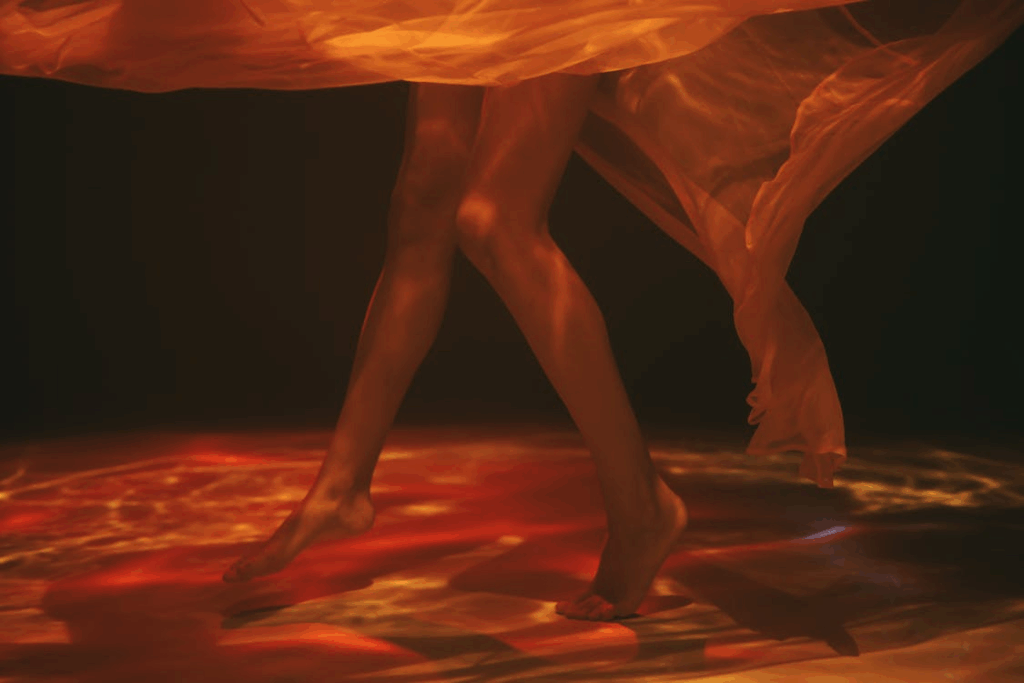
Regular portrait sessions can start to feel like déjà vu. Underwater portrait photography changes that both creatively and financially. In this gravity-free world, fabric sculpts itself, hair drifts like ink in water, and light bends into cinematic streaks. It’s a look clients can’t find anywhere else, and they’ll pay for it. Seasoned photographers charge $800 to $5,000 per session, thanks to the specialized gear, planning, and wow factor.
While others fight over backdrops and discount packages, underwater shooters operate in a near-empty niche. The technical demands alone keep most competitors on dry land, leaving the few who dive in with more premium bookings and less price pressure.
This guide covers everything — camera housings, strobes, buoyancy control, safety, and the post-processing that turns blue-tinted RAWs into portfolio gold. It also shows how Aftershoot can handle the culling and batch editing, so photographers can offer a high-end service without sacrificing their evenings or their sanity.
TL;DR
Underwater portrait photography is visual storytelling where physics becomes optional. Unlike portrait photographers who work with predictable lighting, underwater shooters battle color-stealing water, buoyancy challenges, and gear that costs more than most cars. You’re creating impossible-looking art that commands premium pricing because clients know they can’t get it anywhere else.
This approach is reshaping luxury portrait markets. Today’s clients want experiences, not just photos. They’re willing to pay $800-5,000 for sessions that create Instagram-stopping content and gallery-worthy art.
Key takeaways:
- Preparation is everything — 70% of your work happens before anyone touches water, from gear checks to buoyancy drills
- Safety isn’t optional — dedicated spotters, hand signals, and proper weight distribution keep everyone breathing
- Gear investment creates barriers — pressure-rated housings and dual strobes keep competitors on dry land
- Water destroys color — strobes positioned 45° off-axis restore reds while minimizing backscatter
- AI handles the grunt work — tools like Aftershoot cull hundreds of RAWs and batch-edits in minutes
As underwater portraiture grows in popularity, photographers who master the technical challenges while streamlining post-production are commanding the highest rates in the portrait market.
What Is Underwater Portrait Photography?
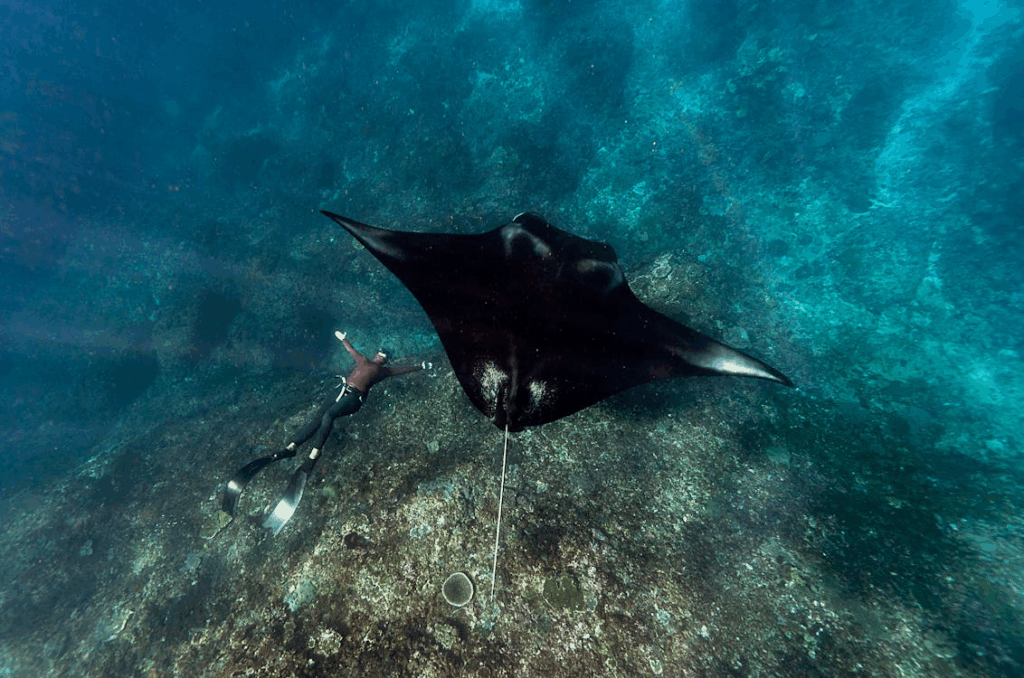
The art of capturing people in aquatic environments —pools, oceans, lakes where normal physics cease to apply and fabric flows like liquid silk. You’re trading studio strobes for specialized housings, controlled lighting for color-correcting strobes, and predictable sessions for the mesmerizing challenge of working where every breath matters.
This isn’t just “portraits with water.” The medium transforms everything: subjects move in slow motion, light becomes sculpture, and ordinary clothing turns into flowing art. A simple chiffon dress becomes a living, breathing extension of the model. Hair defies gravity. Even a basic portrait setup requires specialized gear that costs more than most photographers’ entire lighting kits.
The reward? Sessions that command premium pricing because clients know they’re getting something impossible to recreate on land. These aren’t lifestyle portraits with a splash of creativity, they’re immersive experiences that produce gallery-worthy art and Instagram-stopping content that keeps referrals flooding in.
Underwater Portrait Photography Gear, Setup & Lighting Tips
Photography communities are blunt about underwater photography’s barriers to entry.
As one photographer noted in ScubaBoard forums: “Underwater photography is not for the neophyte. Good buoyancy control is critical… Also underwater photography is challenging… And there is expense.”
The thread reveals a universal truth, this isn’t a genre you casually dabble in without serious gear investment and technical preparation.
Grab a coffee, because this is where the magic (and the leaks) happen. The right kit turns a splashy mess into gallery-worthy art, and the wrong kit turns your camera into an expensive submarine. Here’s the gear that keeps you shooting—and breathing—underwater.
Essential Underwater Portrait Photography Camera Gear
Your camera body needs snappy autofocus to track drifting fabric and hair in low light. Full-frame workhorses like the Canon R5 or Sony A7 series handle shadowy pool corners with their high ISO performance, keeping noise from crashing your ethereal party.
That camera needs protection, though. A depth-rated housing from Nauticam, Ikelite, or AquaTech is basically scuba gear for your camera. Inspect those O-rings every single time you close the back—one grain of sand can cost you a sensor. Ask me how I know.
For lenses, stick with wide glass like 24–35mm or 16–35mm. You want to get close (less water equals sharper files) while keeping faces flattering. Here’s where ports matter: dome ports keep your wide-angle’s field of view intact and nail those dreamy over/under composites. Flat ports play nicely with standard focal lengths but magnify about 25% because of refraction, so frame accordingly.
Lighting Techniques to Avoid Color Loss
Water eats light for breakfast, starting with reds and working its way through the spectrum. By five feet down, your model already looks like they joined the Blue Man Group. That’s why dual strobes or high-output LEDs aren’t optional — they’re survival gear for your color palette.
Choose units with diffusers and fast recycle times so you’re not waiting while your model burns oxygen. Mount them on a tray with arms and ball clamps — think submerged light stands that let you swing strobes wide without playing Twister.
Safety Equipment for Underwater Portrait Photography
A weight belt can be the difference between elegant hovering and flailing like a cork. Bring spares for your talent because buoyancy is personal. Don’t forget the unsexy but crucial stuff: silicone grease and spare O-rings. Grease every sealing surface and stash extra rings in a dry box. Cheap insurance, priceless peace of mind.
Slip desiccant packs inside the housing to catch condensation when warm water meets your air-conditioned camera. For the basics, you’ll need a mask, fins, wetsuit or drysuit, and a trusty spotter. Pools are forgiving; oceans show no mercy.
Pool vs. Open Water Shooting Considerations
In a tiled pool, you can plug lights into the wall, stand on the bottom, and sip lattes during card swaps. Your housing’s depth rating can be modest, and you might run a lighter setup.
Once you hit the ocean, everything changes. Saltwater demands higher depth ratings, stainless hardware, and wrist lanyards. Currents yank at light arms, so shorten them or add floats. You’ll want a surface marker buoy, safety diver, and a wetsuit thick enough to keep hypothermia from photobombing your session.
Light Positioning and Strobe Setup for Best Results
Water murders light systematically. Reds vanish first, then oranges, yellows, and finally greens. Your two main weapons against this color genocide are smart sun positioning and strategic strobe placement.
Use the sun wisely
Stay shallow and shoot when it’s high roughly 10 a.m. to 2 p.m. so light shafts slice straight down instead of across your frame. Keep the sun at your back for even skin tones, or side-light for mood. Position matters more than power here.
Deploy strobes strategically
Mount them wide, slightly behind the dome, and angle them so only the feathered edges kiss your subject. This “off-axis” setup reduces backscatter—those evil snowy dots that appear when light ricochets off suspended particles. Use a 45° twin-strobe spread with mid-range power to freeze motion without nuking highlights.
Pro move: If the water looks chunky, pull the strobes farther out and dial down power. Less photon blast equals fewer snowglobe specks.
Read Also: Portrait Photography Lighting Tips
Maintenance Rituals That Protect Your Gear
Salt and chlorine don’t care about your bank account. After every session, dunk the entire rig in fresh water, work every button to flush residue, then air-dry in shade. Once the housing is open, wipe the O-ring channel, inspect for hair or grit, grease lightly, and store everything with silica packets. This spa treatment fends off corrosion, mold, and the heartbreak of mystery leaks.
When you’ve matched the right housing and port to your lens, balanced buoyancy with proper weight, and lit the scene like an aquatic studio, submerged sessions become predictable in the best way. Invest in the gear, pamper it religiously, and let your creative brain focus on storytelling rather than leak paranoia.
How to Shoot Underwater Portrait Photography: Step-by-Step Process
Submerged portraits look effortless on Instagram, but the process demands mastering three equally critical phases: meticulous preparation, fluid execution, and color-correcting post-production. Here’s the bulletproof system that turns aquatic chaos into profitable art.
1. Before the Shoot – Prep & Planning
Preparation is where the magic (and the safety) live, so build a routine you can repeat for every client.
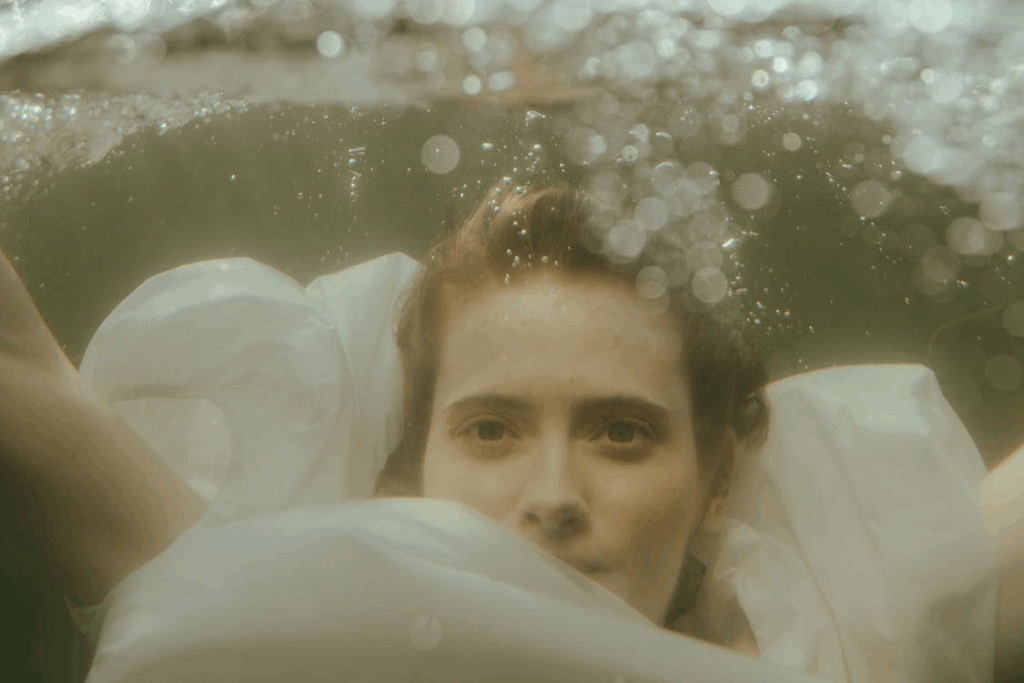
Concept & Comfort – Sit down with your client and storyboard the vibe — dreamy bridal, mermaid fantasy, or high-contrast fashion. While you’re at it, assess their water confidence. A gorgeous chiffon gown is worthless if the wearer freezes at the first bubble.
Wardrobe That Floats – Light fabrics like silk or chiffon billow beautifully, while heavy cotton sinks like a soggy burrito. For proof, scroll through the flowing dresses in this underwater elopement guide from Salt & Stone Adventure Photo Studio.
Dry-Run Poses and Breath-Work – Walk clients through poses on land, then practice relaxed, deep breathing to lower heart rate. A quick static-apnea drill builds confidence without risking blackout: inhale for 4 seconds, hold for 10, exhale slowly.
Buoyancy Drills – Your goal is neutral buoyancy, the sweet spot where subjects neither sink nor bob. The hover drill works best: have your model exhale slightly, then float motionless while adjusting micro-breaths.
Location Recon – Map depth, visibility, entry/exit points, and hazards. In pools, look for unobtrusive ladders. In open water, note currents and surge. Bring a printed shot list so you’re not brainstorming waist-deep.
Safety Roles & Signals – Assign a dedicated spotter. Agree on simple hand signals: thumbs-up to surface, flat hand to stop, clenched fist for distress. Rehearse signals topside.
Gear Tests – Inspect and lubricate O-rings, vacuum-seal housings and perform a shallow dunk test, and pack silica packets to fight fog.
2. During the Shoot – Strategy & Flow
With prep handled, it’s showtime. I break every session into three mini-blocks: warm-up dips, hero shots, and experimental play.
Start Easy – Guiding your subject into the water slowly prevents the “cold-shock face” that ruins otherwise perfect frames. Use continuous LED light for focusing, then switch to strobes for the real exposure. Water absorbs red light rapidly, with significant loss beginning within the first 10 to 13 feet, so artificial light is strongly recommended for accurate colors in underwater photography.
Baseline Settings – Manual mode at 1/250 s, f/4, ISO 400 keeps action crisp while your strobes freeze motion. Dial strobe power to half and angle each head 45° outward. This off-axis trick slashes backscatter.
Lighting Dance – If you’re in a pool at noon, work with sunlight slicing through the surface. Position a reflector topside to bounce golden fill onto your subject — instant cinematic shimmer.
Model Direction – Talk is impossible, but gestures aren’t. Hold eye contact, mime a slow arm extension, or twirl a finger to cue a hair flip. Keep movements deliberate; the water will add its own slow-motion filter. For dramatic hair flow, have the model flick once, then freeze while you fire a burst of three frames.
Emergency & Quick Fixes – Foggy dome? A drop of baby shampoo and fresh rinse kills fog without harming optics. Stray fabric? Tiny spring clamps disappear behind a hip. Spare two-pound weights rescue floaty subjects; hair ties corral runaway curls.
Backscatter Management – Get close within three feet. The less water between lens and subject, the fewer particles to reflect strobe light. Aim your strobes so only the beam edges kiss the scene.
3. After the Shoot – Selection, Editing & Delivery
Photography communities consistently discuss underwater workflow struggles.
In DPReview forums, one photographer shared: “Unfortunately, underwater photography is not cheap. It’s about 3x as expensive as regular photography” and noted that the complexity extends beyond gear into post-processing challenges that consume entire weekends.
Gear TLC – Rinse housings, strobes, and weight belts in fresh water immediately. Salt crystals are tiny assassins.
Data Redundancy – Dual card slots are a lifesaver—back up before you even think about opening Lightroom. Copy files to two drives while you towel off.
AI-Powered Culling – Aftershoot scans hundreds of submerged RAWs and flags the sharp, eyes-open winners in minutes. No more pixel-peeping soggy misfires.
Core Edits – Start with white balance; water murders reds first, so slide temperature warmer until skin looks human. A quick Dehaze bump battles residual murk.
Backscatter Cleanup – Use Lightroom’s spot tool or hop into Photoshop for the heavy lifting. Remember: larger, softer brushes hide your tracks.
Delivery Timeline – A 24-hour teaser is what clients love. The full gallery drops within two weeks (with Aftershoot you can sort and edit your underwater portraits within minutes)
File Management – Rename files with date-location-client for future sanity, then archive originals plus final TIFFs. Your future self (and any print lab) will thank you.
Master each of these three phases and submerged portraits shift from chaotic gamble to profitable signature service.
Post-Processing Workflow for Underwater Portraits
You surfaced with a memory card full of blue-tinged files, specks of backscatter, and a model who looks more Smurf than siren. Don’t panic, this is where the magic happens. Post-processing turns those raw captures into wall-worthy art and, with the right tools, saves you from spending your life hunched over sliders.
Popular Editing Styles for Underwater Portraits
Most submerged portrait editors gravitate toward one of three looks:
- Dreamy Pastel with soft contrast and airy hues that make chiffon gowns look like clouds
- Cinematic Contrast featuring deep blacks and punchy midtones for big-screen drama

- True-to-Life Blues with minimal stylization and accurate skin tones against pure oceanscape
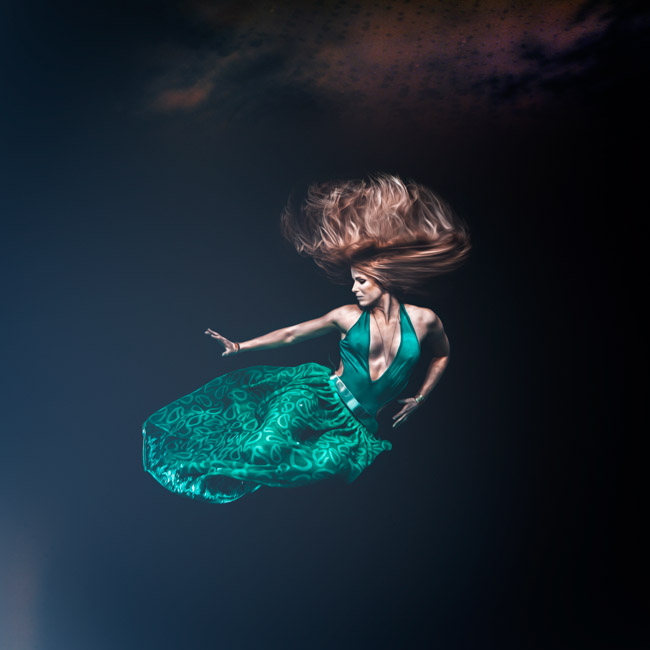
Watch this video to go behind the scenes of this portrait clicked by Jesper
Color Correction and Cleanup Basics
Water strips warm wavelengths fast. Reds fade first, then oranges and yellows, leaving everything a muddy cyan. I open the batch in Lightroom and head straight for White Balance. Instead of stabbing at the temp slider, I use the eyedropper on a neutral object as recommended by Adventure Pangea’s guide. If nothing neutral exists, I pull up the temperature until skin looks human again, then nudge Tint toward magenta to cancel the notorious green cast.
Next stop: Dehaze. A gentle push (10–25 points) slices through the fog of suspended particles and amps contrast without nuking highlights. Follow up with a subtle Clarity boost and a touch of Vibrance. Resist cranking Saturation; cartoon coral is not the goal.
Backscatter Cleanup: The particles you couldn’t outrun will still pepper your frame. Zoom to 100% and go whack-a-mole with Spot Removal. For clusters, hop into Photoshop’s Healing Brush and sample-and-stroke to erase entire snowstorms of backscatter in seconds.
AI Workflow Integration for Faster Editing
This is where Aftershoot Edit takes over. Once it identifies the keepers in minutes, it applies the photographer’s hero edit across every similar frame instantly. The AI reads their adjustments, matches them to files with the same depth, exposure, and lens data, and delivers a polished set before the coffee finishes brewing. All processing happens locally, so client RAWs never leave the photographer’s SSD, a clear privacy win.
A 300-image pool session that used to devour five hours now wraps in sixty minutes, thanks to AI handling the heavy lifting. Once colors pop and skin sparkles,grade for mood and export. Clients get web-ready JPEGs plus a curated set of high-res TIFFs for print.
Underwater Portrait Photography Pricing: How Much to Charge?
If you’ve already shelled out for a pressure-rated housing, dual strobes, vacuum pump, and a spare action cam “just in case,” you know submerged portrait gear isn’t cheap. That investment becomes your first marketing advantag. Clients understand that someone bold enough to waterproof a $3,000 body inside a specialized shell is offering something they can’t get from the weekend DSLR warrior.
Session Rates by Type
Choose income ranges that reflect the specialized nature of underwater portraits:
- Pool-based portrait sessions: $800-1,500
- Ocean/lake environmental shoots: $1,200-2,500
- High-end fashion/commercial work: $2,500-5,000+
- Wedding underwater segments: $500-1,200 add-on fees
Revenue Multiplication Strategies
- Behind-the-scenes video content from your backup action camera
- Fine-art metallic prints that showcase vibrant reds restored by strobes
- Looping video portraits for digital frames
- Mini-sessions leveraging setup costs across multiple clients
Read also: Photography Pricing Calculator + Guide to get you started
Why Premium Pricing Works
Scarcity breeds value, and aquatic sessions easily sit in the premium tier of any portrait menu. Every session relies on specialized kit — dome ports, silicone-greased O-rings, and weight systems not to mention the post-shoot freshwater rinse ritual.
That overhead naturally pushes rates beyond land-based shoots and helps clients see the “why” behind your quote. Most clients have no clue how quickly water steals color or how many moving parts go into preventing leaks. A quick pre-shoot email explaining that strobes restore the reds water eats away, or that your extra O-rings and lubricant act as insurance for their memories, reframes your fee as a safety net rather than a splurge.
The Efficiency Advantage
Specialized work means you’re pulling hundreds of RAWs riddled with missed focus, bubbles, and blinked eyes. Let Aftershoot auto-flag the duds while you rinse housings. Culling that once swallowed an evening now wraps before the gear is dry.
The same AI can batch edit your signature color-grade, slashing editing hours. Less screen time means faster delivery, happier clients, and more dates on the calendar. When premium craft meets AI efficiency, you’re not just covering the cost of dive weights. You’re turning every submersion into a buoyant line item on your P&L.
Before you add another tool to your plate, see how it actually feels to use it. Our self-guided demo lets you try Aftershoot’s culling, editing, and retouching right in your browser
Getting Started with Underwater Portrait Photography Business
Underwater portrait photography isn’t just a niche it’s a stage where creativity, scarcity, and premium pricing meet. The technical barriers that keep most photographers on dry land are the same ones that let those willing to dive in own the market. With the right gear, safety know-how, and post-processing workflow, every session becomes both an artistic statement and a high-value service.
Pair that with tools like Aftershoot to handle the culling and editing grunt work, and photographers can focus on what makes this genre shine: crafting surreal, gravity-defying images clients can’t stop talking about. Ready? The water’s waiting.
P.S. Aftershoot is free to use. Start your free 30 day trial and see the difference yourself