How to Cull Photos in Lightroom: Organize Like a Pro
Learn Paul’s tried-and-tested process of how to cull photos in Lightroom.
Culling photos is essential—but it can sometimes be overwhelming. My name is Paul Waring, I’m a busy wedding photographer in the UK and I know just how daunting it can feel to sort through thousands of images after a weekend of shooting. But, trust me, mastering the culling process can be a game-changer.

Back in the day, I’d spend way, way too much time deciding which images to keep and which to toss. It was frustrating, it ate into the time I could’ve spent editing or, better yet, spending time with my family (I’ve got a two-year-old who wants more time at the zoo!). Over the years, though, I’ve developed a system in Lightroom that’s fast, efficient, and even enjoyable, at times.
In this guide, I’ll walk you through my tried-and-tested process of how to cull photos in Lightroom. If you’re looking to improve your workflow, I’ll share not only the steps but also some hacks I’ve picked up along the way.
Why Cull Photos in Lightroom?
Before I began using Aftershoot (I’ll speak more on this later), Lightroom was my go-to tool for culling and editing. For wedding photographers like me who shoot thousands of images per event, efficiency is everything. Culling isn’t just about getting rid of bad photos; it’s about narrowing down the best of the best to tell a cohesive story.
So, why Lightroom? First, it’s where I edit my images, so keeping everything in one place makes sense. Its organizational tools, like flags, star ratings, and color labels, make sorting easy. As a bonus, Lightroom’s ability to render high-quality previews ensures I’m judging each image at its best.
Compared to standalone photo-culling software, Lightroom may not be the fastest, but it’s a powerhouse for photographers who value precision and flexibility.
How to Cull Photos in Lightroom?
Let me walk you through my Lightroom culling process step by step:
Step 1 – Organize Your Photos
As with most things, proper planning and preparation will serve you well before you start culling. Before heading into Lightroom, take a moment to get your photos organized. Trust me, this will save stress down the line.
Set up folders on your computer or external hard drive with clear, consistent naming conventions. For example:
Photos > 2024 > Weddings > Client Name
This simple structure ensures every photo is easy to locate, especially during busy seasons.
Another important step is your backup. ALWAYS keep multiple copies of client photos, especially weddings. My way is to keep two mirrored hard drives in my office, and a third copy in cloud storage.
Step 2: Import Your Photos
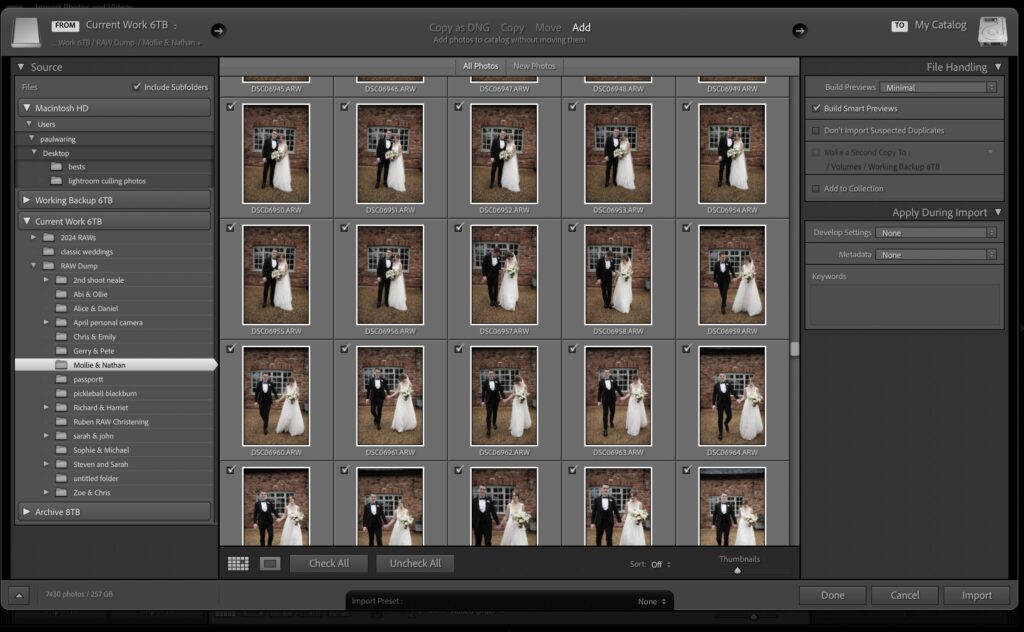
Before you start culling, you’ll need to import your photographs into Lightroom. We call this ‘importing’. You can import directly from the SD card, but I recommend organizing your photographs on your computer first.
When you click ‘import’ in the lower left corner of Lightroom, you’ll see a list of folders on your computer. Find the folder containing your images and select them.
The options at the top of the screen are Copy as DNG, Copy, Move and Add. As we have already refined our folder structure, you can select Add to keep the photos in the same location.
You’ll see some options on the right of your screen. I always recommend these settings:
- Build Smart Previews: This speeds up culling and editing, especially on slower machines.
- Use Minimal Previews: Keeps your catalog lightweight during import.
- Develop Preset: This a personal choice, I like to add the preset that I will be using on the photographs during the import, to skip a step when editing.
- Keywords: You may wish to add general keywords here, such as ‘wedding’, the location, or the client’s name.
Step 3: Go to the Library Module
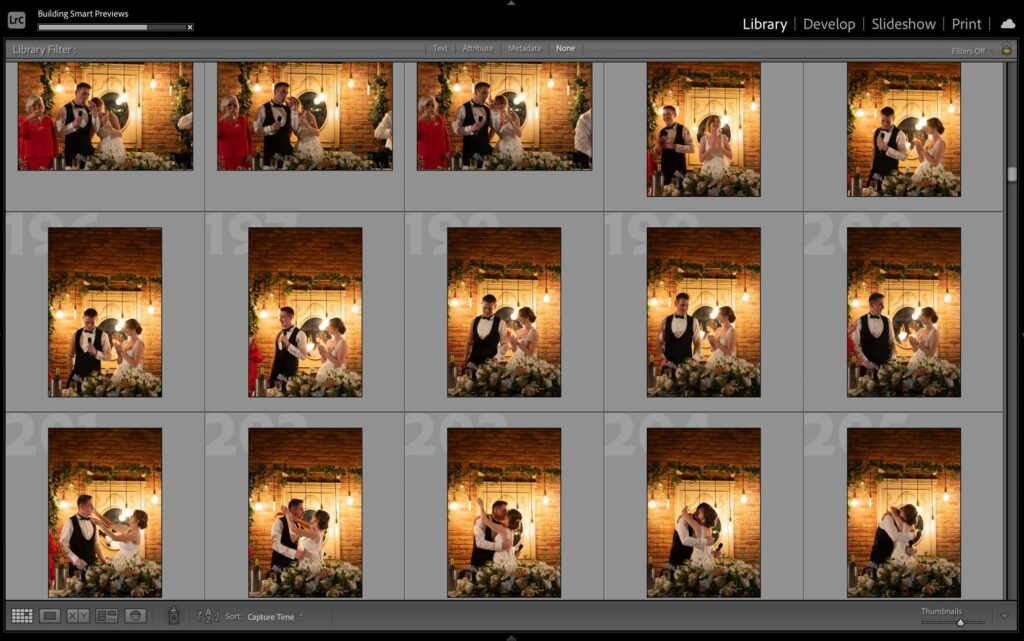
When you’re culling, the Library Module is where you’ll be spending your time. This is your ‘organization station’ and is the best place to cull your photos in Lightroom. You’ll usually land here when you open Lightroom or import your images. You can also click Library or press G for Grid View. This view allows you to see all your images at once, perfect for quickly reviewing large batches.
Loupe View (press E, or double-click an image) zooms in on a single image when you need more detail.
The Library Module in Lightroom is optimized for organization, and speed, and has quick access to flags, ratings, labels, and filters.
When I’m culling, I like to start in Grid View for a quick overview of my photos. I do zoom into these for a closer view using the slider at the bottom of the screen. When I need a more detailed view or to compare similar shots, I use Loupe View.
Step 4: Sort Your Images
Lightroom gives you a few different ways to sort your images. I’ll give some insight into how I use each of these tools:
1. Flags
Flags are a quick way to mark your selections.
- P: Flag as Pick (for the photos I want to keep)
- X: Flag as Reject (can be used for images you don’t want to keep)
- U: Unflag (to remove flags from photos)
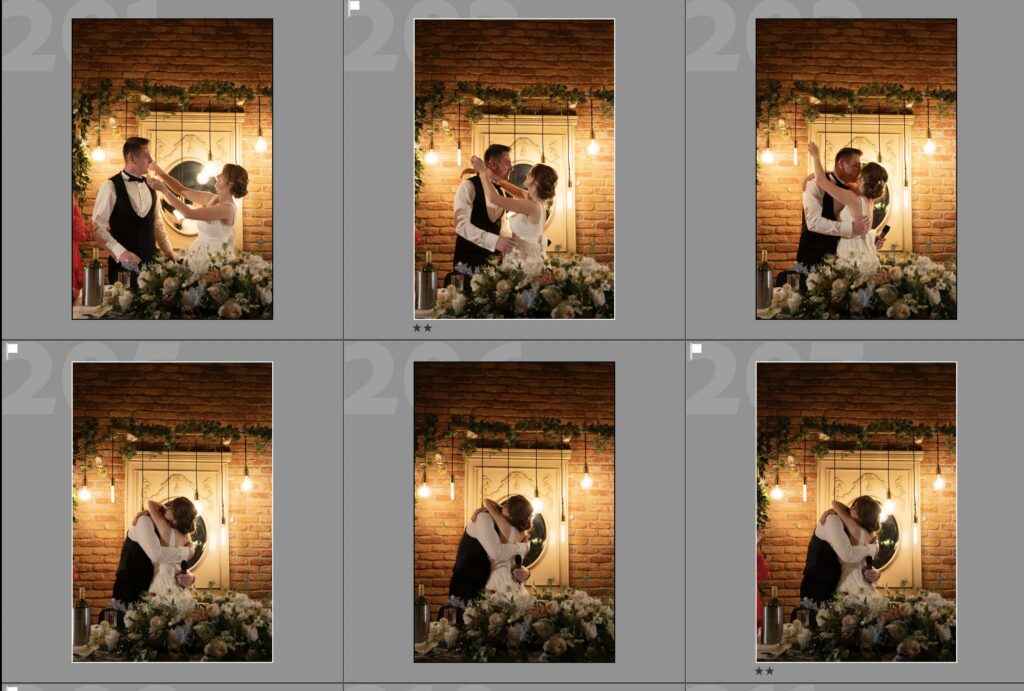
Flags appear as a small flag icon below your photos.
2. Star Ratings
Star ratings help you rank photos based on quality or importance.
1-5: Press a number key to assign a star rating.
I typically use:
- 5 stars for the best shots I might want to use for my portfolio.
- 2 stars for decent images to include in client previews.
- 1 star for images I may want to revisit or edit further.
- No stars means I’m still deciding or it’s a reject.
3. Color Labels
Color labels are a great way to categorize photos. I often use them if I’m creating wedding albums or choosing photos for social media. To apply a color label, press 6 (Red), 7 (Yellow), 8 (Green), or 9 (Blue).
You’ll likely find your own process, but mine is simple and efficient. I start by going through all the images in Grid View (with the thumbnails set larger than the default, so I can see around nine images at once on my screen).
I quickly make a first pass using flags and rejections based on instinct. I flag photos that feel “okay” and reject anything that’s obviously unusable—out of focus, eyes closed, or just a shot I know won’t be used.
I delete the rejected photos from Lightroom (but not from my computer, just in case). To do this, go to Photo > Delete Rejected Photos > Remove from Lightroom in the top menu.
I grab a strong coffee (an integral part of the process) and let my eyes rest before the next step.
Now it’s time for a more thoughtful, in-depth selection. Still in Grid View, I go through the remaining photos and start assigning star ratings:
- 1 star: Any photo that will be delivered to the client.
- 2 stars: The best photos from the set—those that will be edited first for the client preview.
- 5 stars: Any shots I think are the best examples of my work get 5 stars. These will be edited for my website, social media, etc.
This is where I may switch to Loupe View to check critical focus or compare shots.
By the end of this process, I’ve narrowed down my selection I’m ready to move on to my photo editing workflow.
Step 5: Filter Your Selection
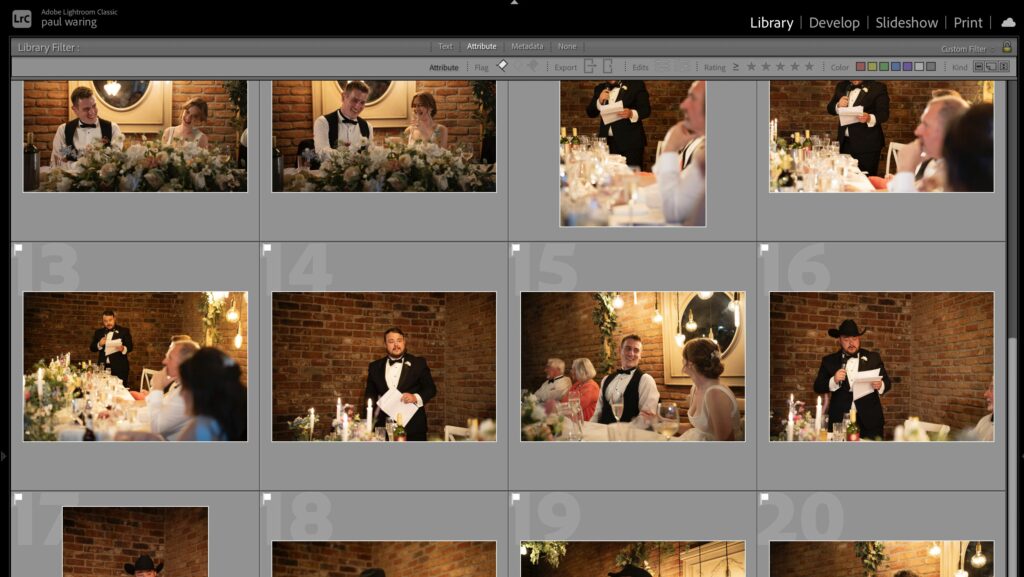
Once you’ve flagged or rated your photos, the best way to cull your photos in Lightroom is to use filters to view only the picks (Shortcut: Ctrl+L / Cmd+L to toggle the filter bar). This allows you to only see the images you’ve flagged, or rated or a combination of different attributes.
Step 6: Deleting unwanted images
After sorting through your photos, you might want to clean up your catalog. You may have additional rejected photos. Go to Photo > Delete Rejected Photos in the top menu to get rid of these.
You can also delete individual photos by right-clicking and selecting Remove Photo.
Bonus Lightroom Culling Tips from Pro A Photographer
For me, culling is all about speed without sacrificing quality. Over time, I’ve picked up a few tricks that have helped my workflow in Lightroom.
Use Smart Previews to Speed Things Up
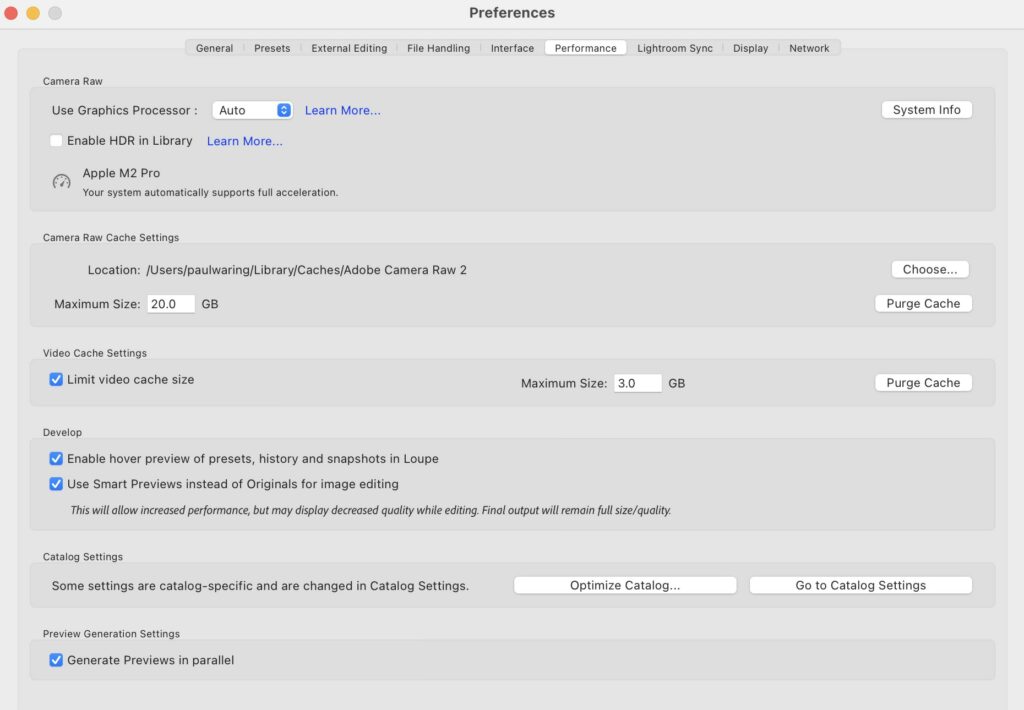
Smart Previews are a lifesaver when working with large files. Lightroom accesses these smaller files instead of the originals, making culling fast without sacrificing image quality. You can even cull on the go with a laptop! Ensure you have ‘Use smart previews instead of originals’ checked in your Lightroom Preferences.
Compare Similar Shots Side-by-Side
Torn between two really similar shots? Use Lightroom’s Compare View (Shortcut: C) to evaluate them side-by-side. This is especially useful for choosing the best expressions.
Master Keyboard Shortcuts
Learning some of Lightroom’s shortcuts was game-changing for me:
- P: Pick flag
- X: Reject flag
- Shift+Tab: Hide all side panels for distraction-free culling
- F: Full-screen mode for detailed viewing
- N: Compare multiple selected photos
Using these consistently will shave minutes off your workflow. Minutes that add up over a wedding season!
Set Auto Advance for Speed
Enable Auto Advance (Photo > Auto Advance) to automatically jump to the next image after applying a flag or rating. It’s a simple hack that saves so much time.
Be Decisive
More of a mindset shift… When I started out, I was hesitant to reject too many photos, scared I might miss something. Now, I trust my gut. If a photo doesn’t immediately stand out, it goes into the “reject” pile (meaning, I don’t flag or rate, the image is left blank). It’s all about staying decisive and efficient!
Optimize Lightroom Catalogs
Large Lightroom catalogs can slow you down. To keep things running smoothly:
- Use a new catalog for each project or year.
- Regularly optimize your catalog (File > Optimize Catalog).
Smart Collections
Set up Smart Collections to automatically group photos based on flags, ratings, or color labels. For example, I have a Smart Collection that gathers all of my “5-star” images into one place. I know I can head straight here for my portfolio updates or Instagram posts.
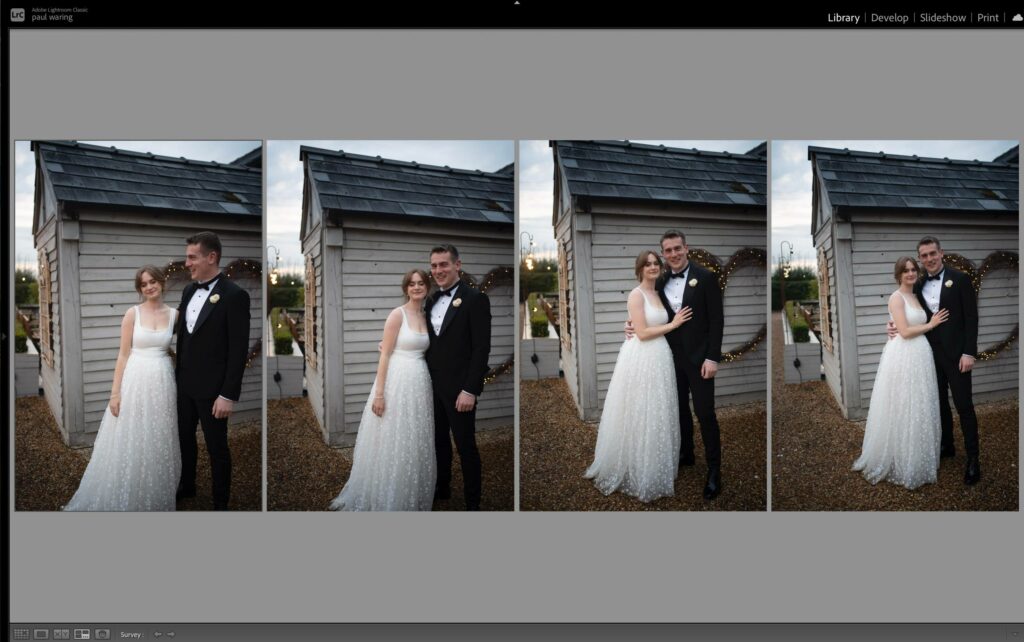
Personal Note: When I started incorporating Survey View and Smart Collections into my workflow, it felt like I’d unlocked a Lightroom cheat code. It’s those small adjustments that make a massive difference over time, especially when culling thousands of wedding photos!
What to keep in mind while culling in Lightroom?
There are a few lessons I’ve learned along the way that have helped shape the way I approach my culling process. Some are about workflow, and others are about mindset—because culling isn’t just about technical skills, it’s also about how you approach the task mentally. Here are some of my biggest takeaways:
Don’t Get Stuck in Perfectionism
When I first started as a photographer, I found myself obsessing over every detail. I’d spend way too much time deciding if a photo was just right or if it needed tweaking. Over time, I realized that perfectionism in culling wasn’t serving me.
Culling Mindset Shift
One of the biggest shifts I made was recognizing that culling is part of the creative process. It’s not a chore to get through, but a chance to curate the story I want to tell. I no longer see it as a tedious task but as an opportunity to connect with the images, I’m presenting to my clients.
One thing that helped me is remembering that every photo I reject is a chance to elevate the remaining ones. When I cull a wedding, I know that I’m not just cutting down numbers—I’m refining the narrative and making the final product stronger.
Over the years, I’ve learned to approach culling with a sense of calm and confidence. It’s not about rushing through it, but about making deliberate choices. And trust me, the more you practice, the faster and more instinctive it becomes.
Keep It Simple and Repeatable
One of the best things you can do during the culling process is to keep your approach simple. Overcomplicating things can slow you down and lead to unnecessary stress. Stick to your system and don’t overthink every choice. Whether it’s your flagging method or your star rating system, the key is consistency.
By making your culling process repeatable, you’ll be able to get faster and more intuitive over time. The goal is to create a workflow that works for you—something you can easily rely on each time you’re going through thousands of images. Once you find what works, you’ll be able to fly through it, making smart choices without second-guessing yourself.
My New Approach to Culling Photos
If, like me, you’re dealing with huge batches of images, you’ll constantly be looking at ways to speed up your workflow whilst retaining creative control. I now do this by pairing Lightroom with Aftershoot. It’s a powerful AI-based culling (and editing) tool that works with Lightroom to streamline your workflow.
Aftershoot doesn’t make decisions for you—it’s a time-saving tool that helps you make faster, more informed choices.
Here, as brief as I can make it, is my new workflow on Aftershoot.
Import my photos into Aftershoot
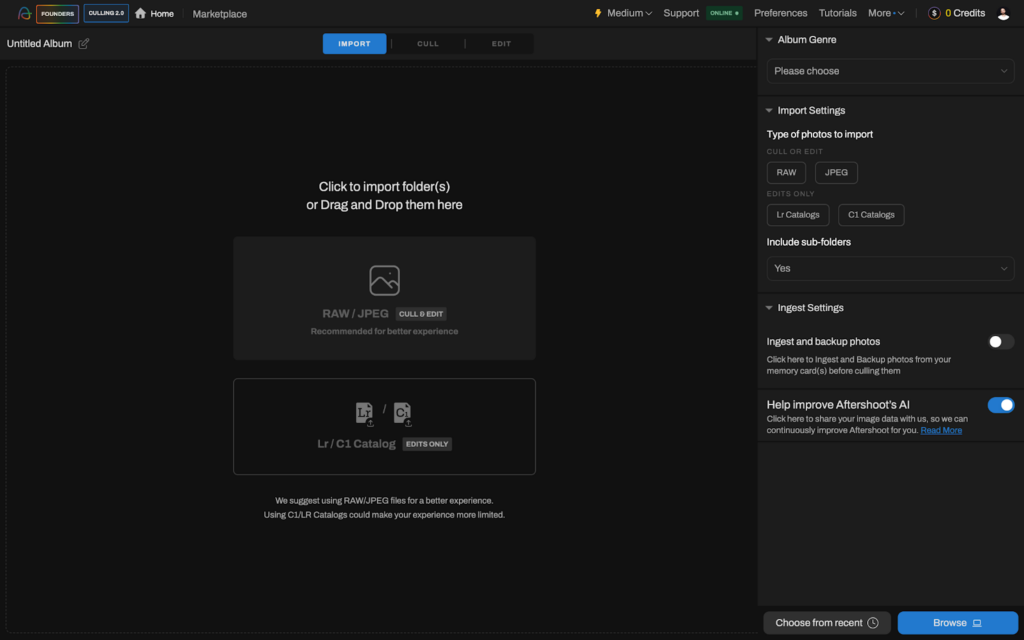
From the two options, AI-assisted or AI Automated culling, I like to use Automated and group images into larger groups. I let Aftershoot do its thing, grouping similar images and choosing the best ones
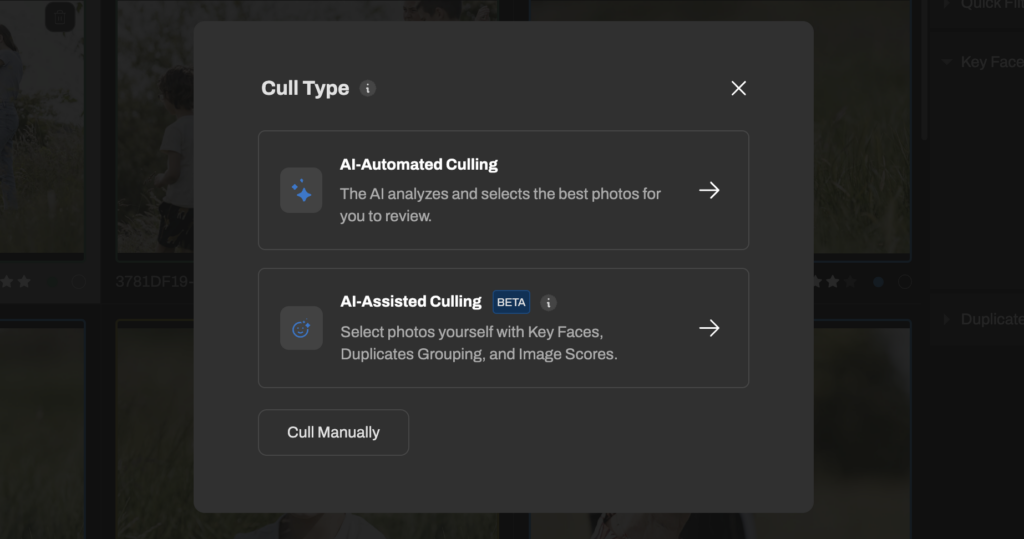
Review my photos in survey mode
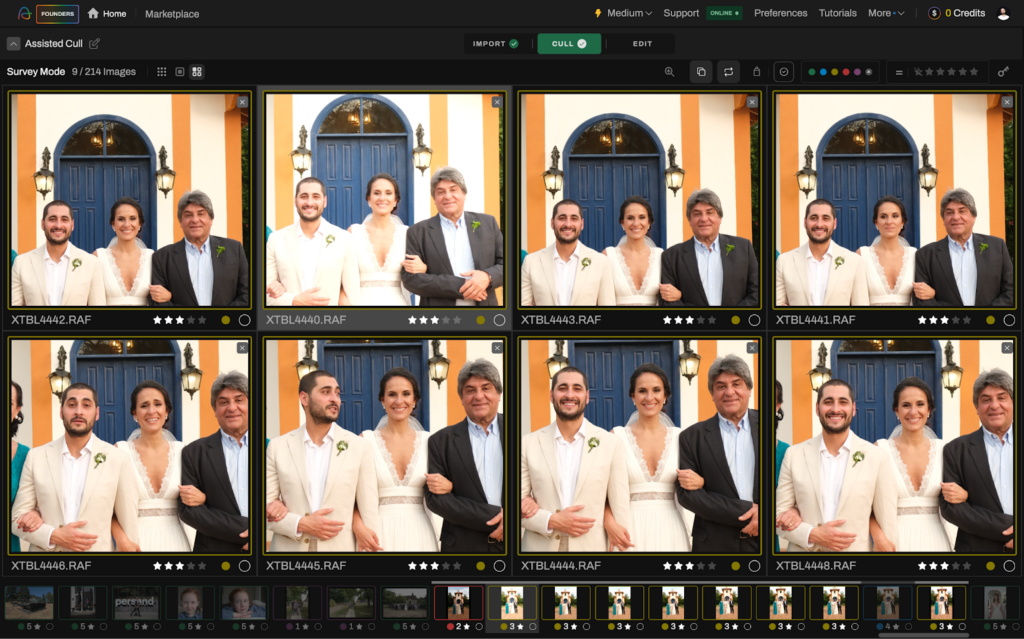
Edit the images in Aftershoot with my AI Profile before exporting to Lightroom
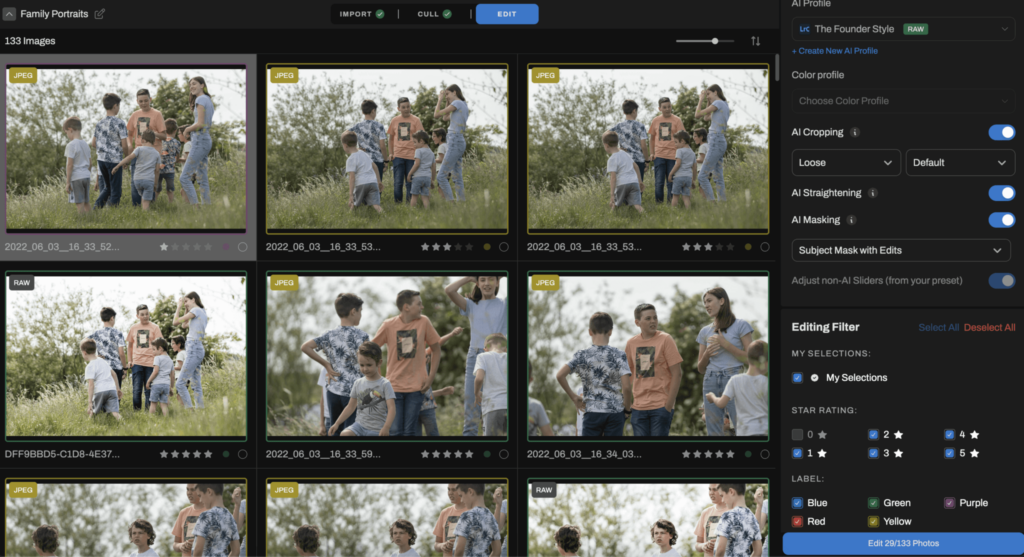
Watch this video tutorial on How to cull on Aftershoot to get started.
I’ve used Aftershoot for an entire wedding season now, and I can honestly say it’s saved me so much time. I’d spend hours going through thousands of images from a wedding.
I can often have upwards of 5000-7000 photos to go through. Aftershoot helps me narrow down the selection to around 500 images in about 40 minutes. Without Aftershoot, this would often take me 3-4 hours!
Aftershoot offers a free 30-day trial so I’d recommend you go ahead and try it out for yourself!
Finding the Right Way to Cull Photos in Lightroom
Culling is an essential skill that can save you time, reduce stress, and help you deliver the best images to your clients. By following these tips and embracing the right tools, you’ll be able to speed up your workflow and get back to what you love most—shooting and editing stunning photos (and family trips to the zoo, of course!)
Remember, it’s all about finding a system that works for you and your unique style. The more you practice, the quicker and more efficient you’ll become.
Happy culling!


